We’ve talked a lot in previous blogs about how the Storj platform’s edge-based delegated authorization model for access control enables developers to create more secure and private applications. In this blog, I’ll share an example of how that actually works with a secure and private file sharing use case using FileZilla.
FileZilla is the most popular FTP client in the world, and it includes native support for the Storj decentralized cloud storage protocol by default. FileZilla Pro also supports the Storj decentralized cloud storage S3-compatible gateway. The combination of the FileZilla client and the Storj DCS platform allows files to be securely shared for a range of use cases, including:
- Storing and streaming multimedia files
- Distributing large files including container images, software updates, firmware, or mobile app or ROM
- Sharing large data sets for ML/AI workloads or scientific data sets
- Storing and sharing data for cloud native applications
- Backing up servers, log files or other data
When you use FileZilla with Storj DCS to store and share data, your data and metadata are encrypted, broken up into erasure-coded pieces and distributed over our network of thousands of storage nodes. Only users you provide an Access Grant are allowed to both access and decrypt the data.
In this example, I’m going to configure the free version of FileZilla for use with a bucket in my Storj DCS account. If you have FileZilla Pro, you can also use FileZilla with the Storj DCS S3-compatible gateway, but I’m going to use the native integration which is available in both versions of FileZilla.
With drag-and-drop ease, I’m going to upload an end-to-end encrypted file to that bucket using FileZilla. Then I’m going to create a restricted Access Grant that provides read-only access to my bucket. Finally, I’ll show how to allow anyone to download that data from anywhere in the world (and only download it) with that restricted Access Grant.
I’m assuming for this blog that you’ve downloaded the free FileZilla client and have registered for a Storj DCS account. The main steps I’ll cover in this blog post are:
- Creating a privileged Access Grant to create a bucket and upload the data you want to share
- Configure the FileZilla client with privileged Access Grant, create a bucket, and upload your data
- Create a read-only restricted Access Grant that can only download the data you want to share
- Configure the FileZilla client with restricted Access Grant, locate the bucket, and download your data
The first two steps involve creating Access Grants. For context, you can check out our documentation or previous blog post to learn more about what Access Grants are and the details around how they work. For purposes of this blog, think of an Access Grant as the encryption key and access rights rolled up for a particular data set. The API key component is programmable in that it can include restrictions based on:
- Specific operations: restrict whether an API Key can perform any of the following operations: Read, Write, Delete, List
- Bucket: restrict whether an API Key can perform operations on one or more Buckets
- Path and path prefix: restrict whether an API Key can perform operations on Objects within a specific path-prefix or object-key
- Time window: restrict when an API Key can perform operations on objects stored on the platform
Encryption keys may be similarly restricted to all data, a single bucket, a single path or object. One thing you’ll see when you create an Access Grant is just how easy it is to restrict access and share only the data you want, without the risk of exposing an entire bucket.
Even though the Access Grant contains both an API Key and an Encryption Key, whether you use the web interface, the CLI or a library, that encryption key is generated client-side. When you use the web interface, you get the most commonly used configuration options, but you can use the CLI to create much more granular levels of access.
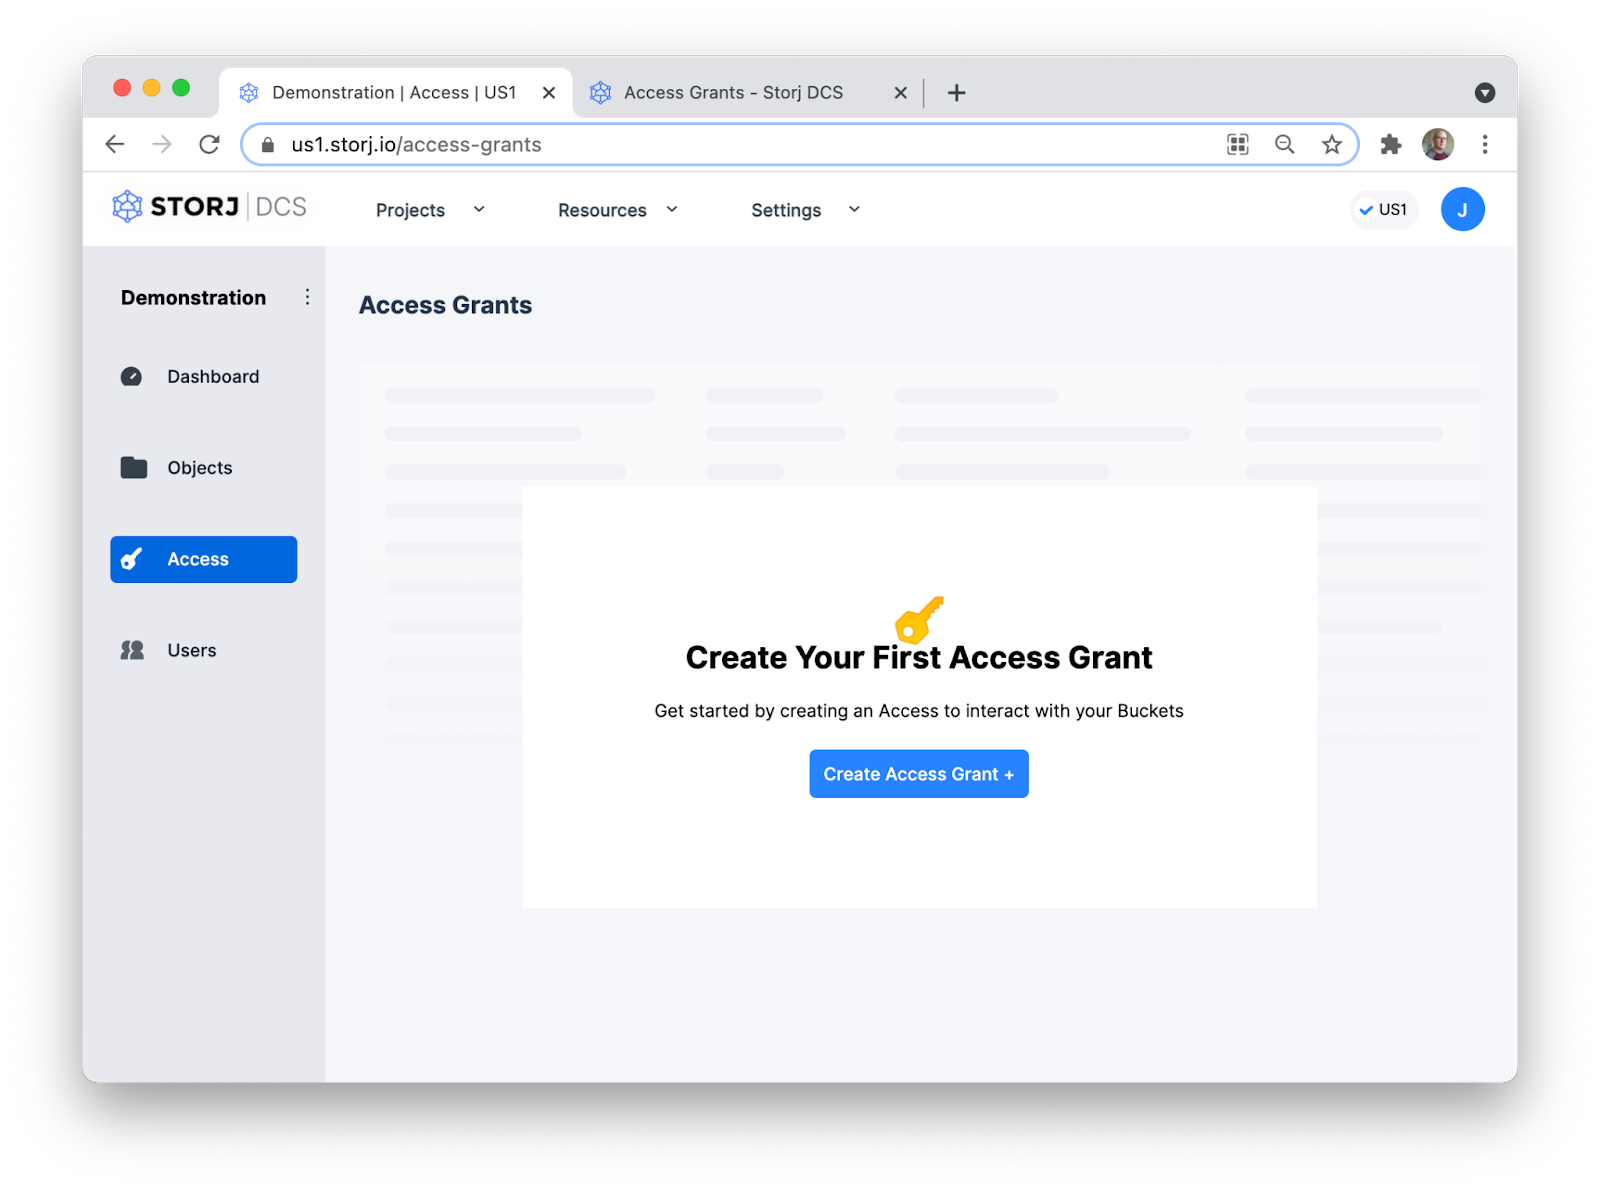
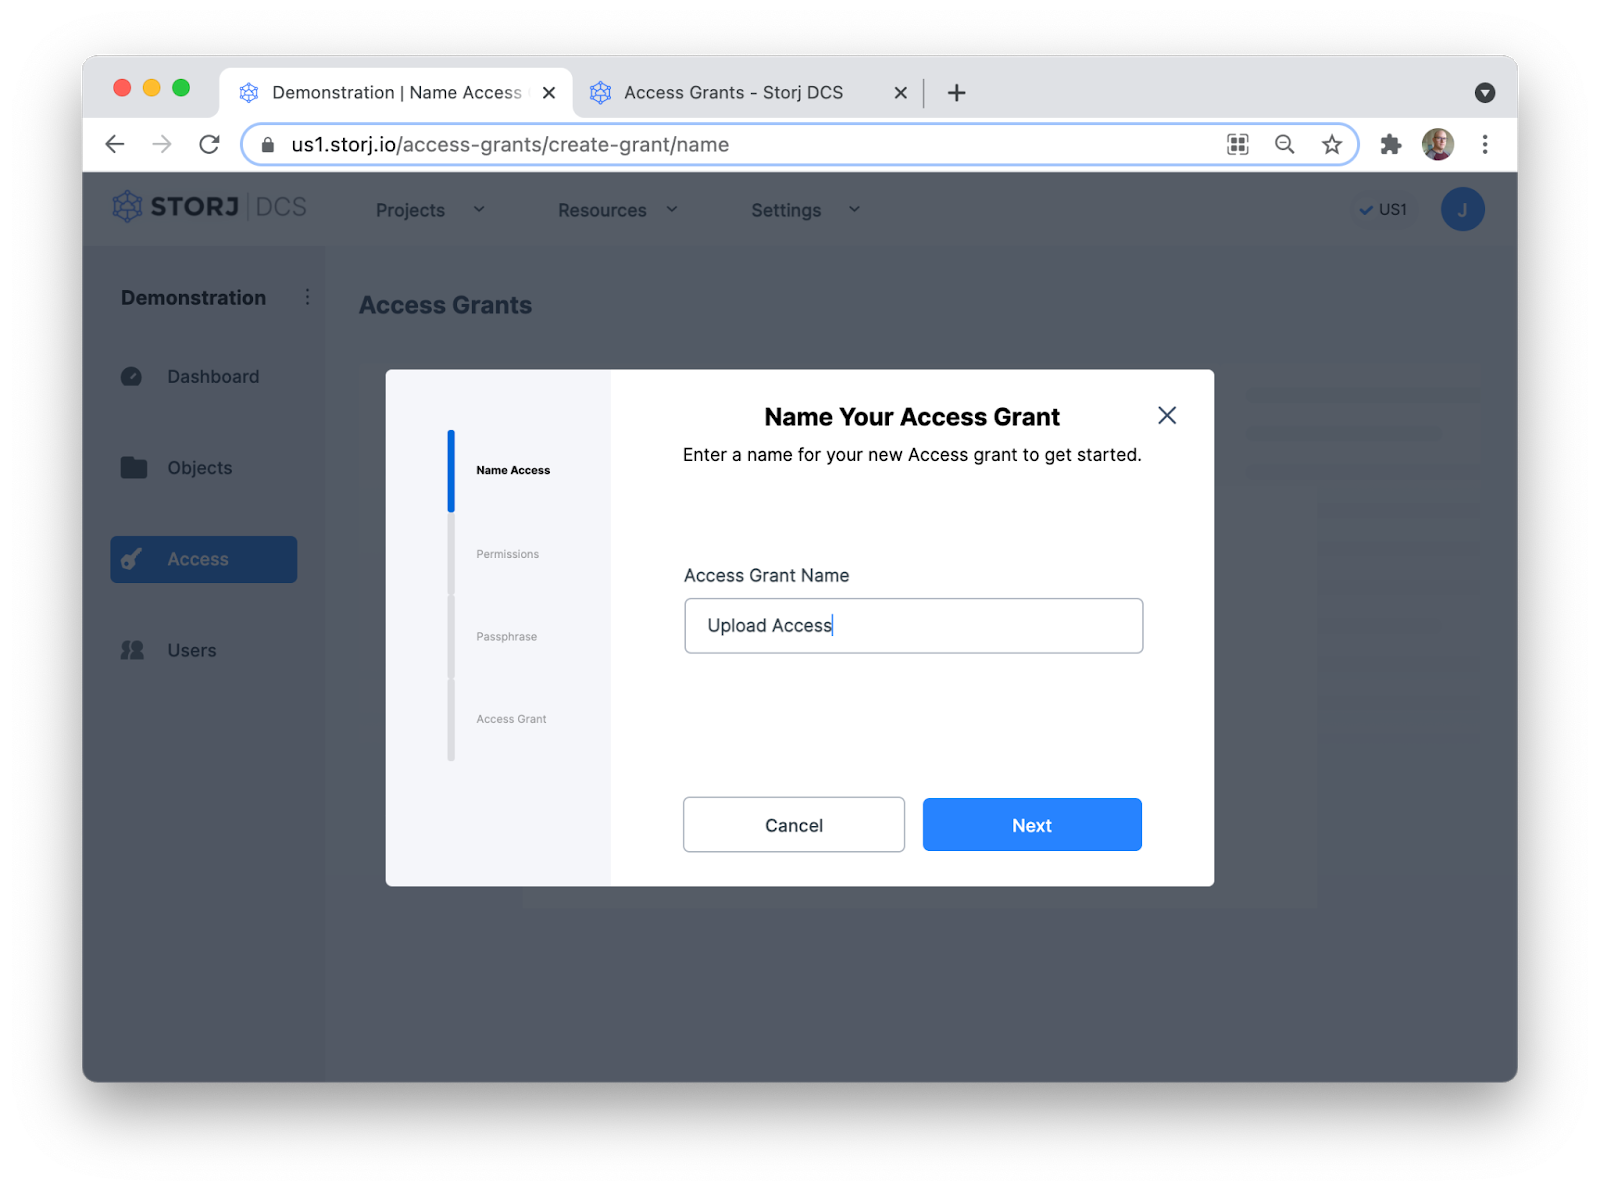
1. Creating Your Access Grant to Upload Data
Let's start with creating an Access Grant for uploading your data. Login to your Storj DCS account and navigate to the Access screen. Click the Create Access Grant Button.
Give your Access Grant a name:
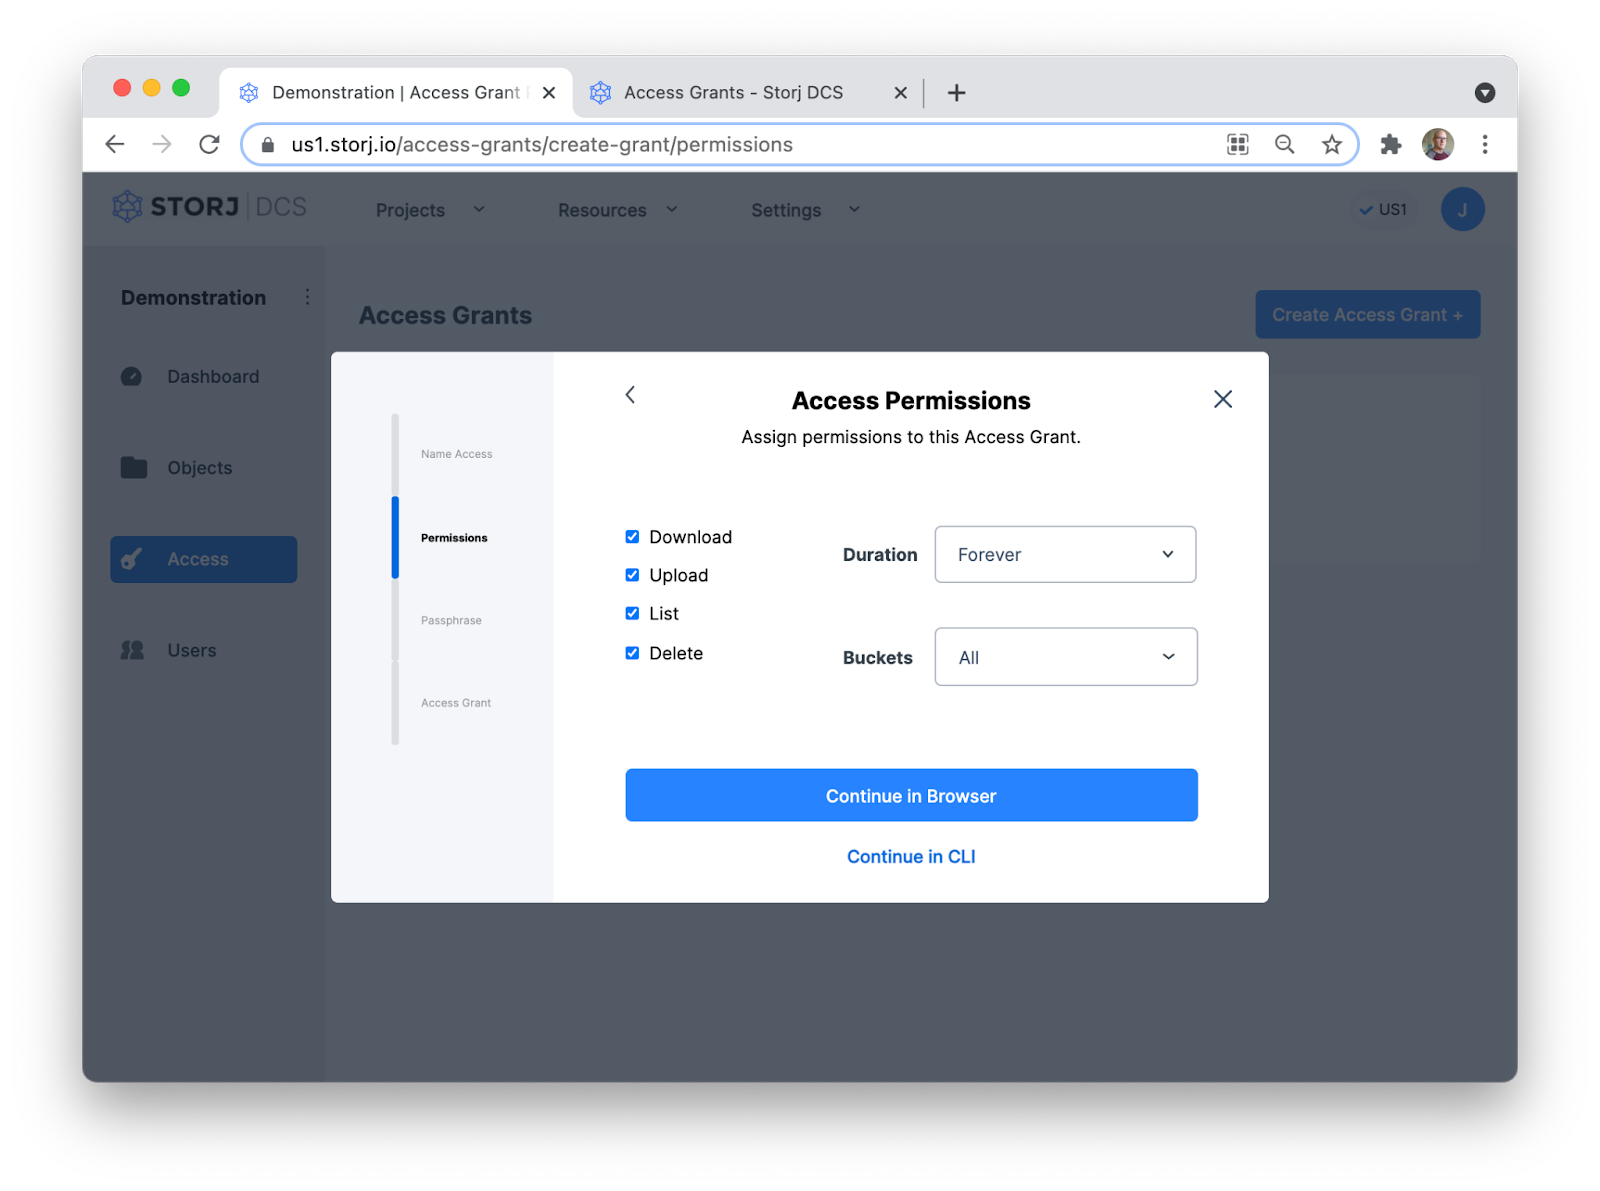
You can set any access restrictions you want encoded into your Access Grant. Through the Satellite Admin Console, you can set basic restrictions on your Access Grant. You can get more sophisticated using the CLI and add further, more granular restrictions, for example, at the path prefix level within a Bucket. For this example, we don’t need to set any restrictions.
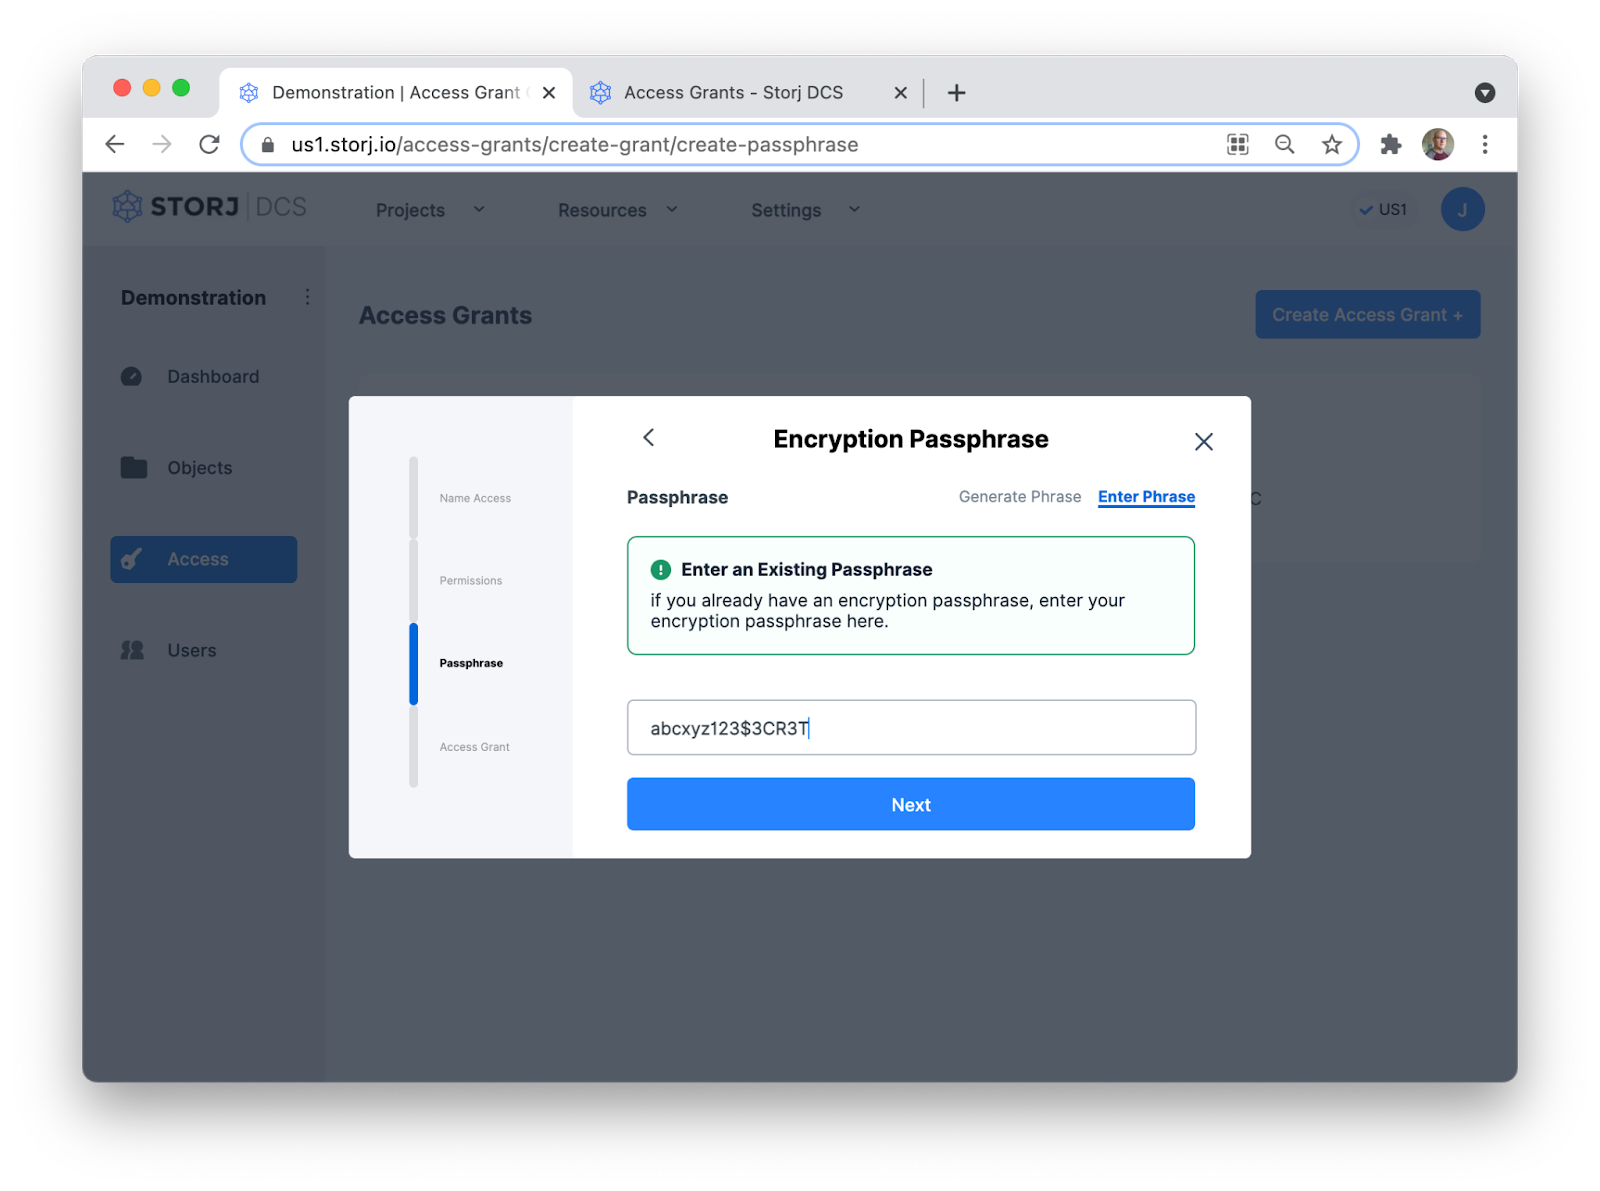
Next, enter an encryption passphrase for your Access Grant. Note that this encryption passphrase is handled by the browser and is not stored by the Satellite.
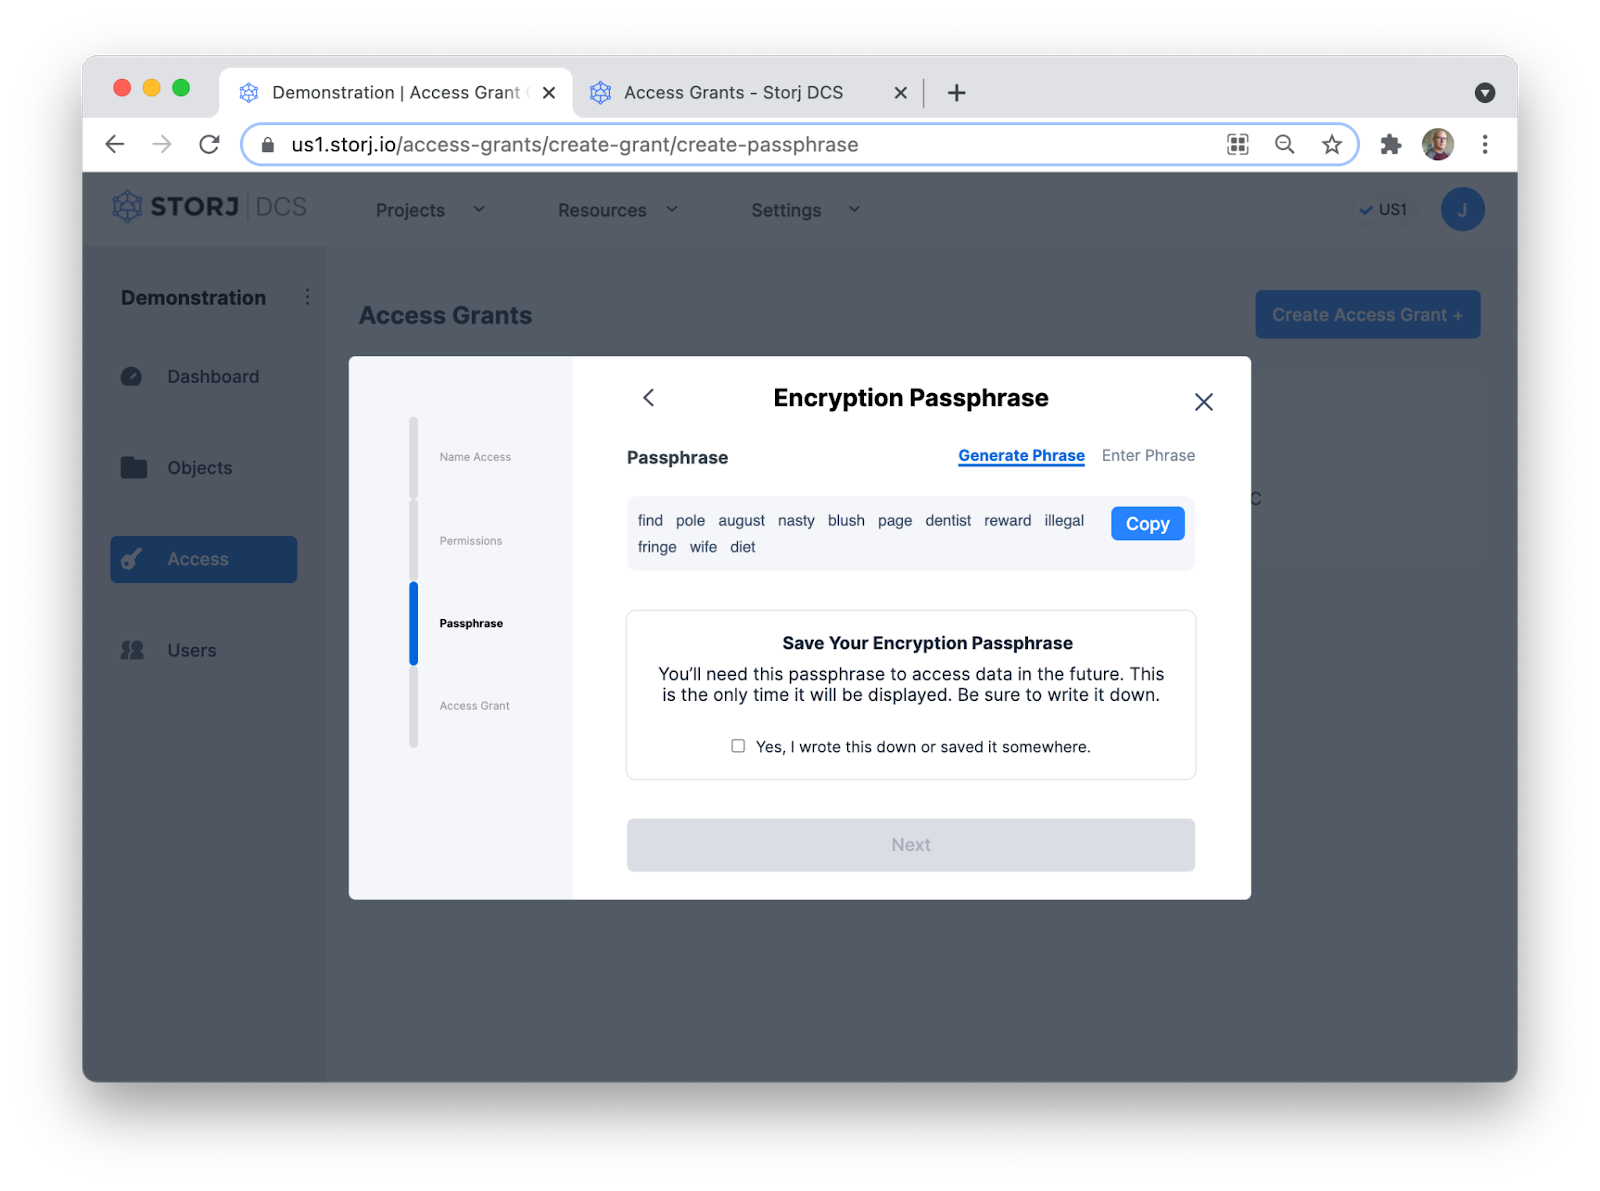
You can use the randomly generated encryption passphrase provided or you can choose “Enter Phrase” to use your own encryption passphrase. In this example, I’ll use my own encryption key.
Do not lose your encryption key. Storj DCS does not manage your encryption keys and if you lose your encryption passphrase and your Access Grant, you will not be able to decrypt your data.
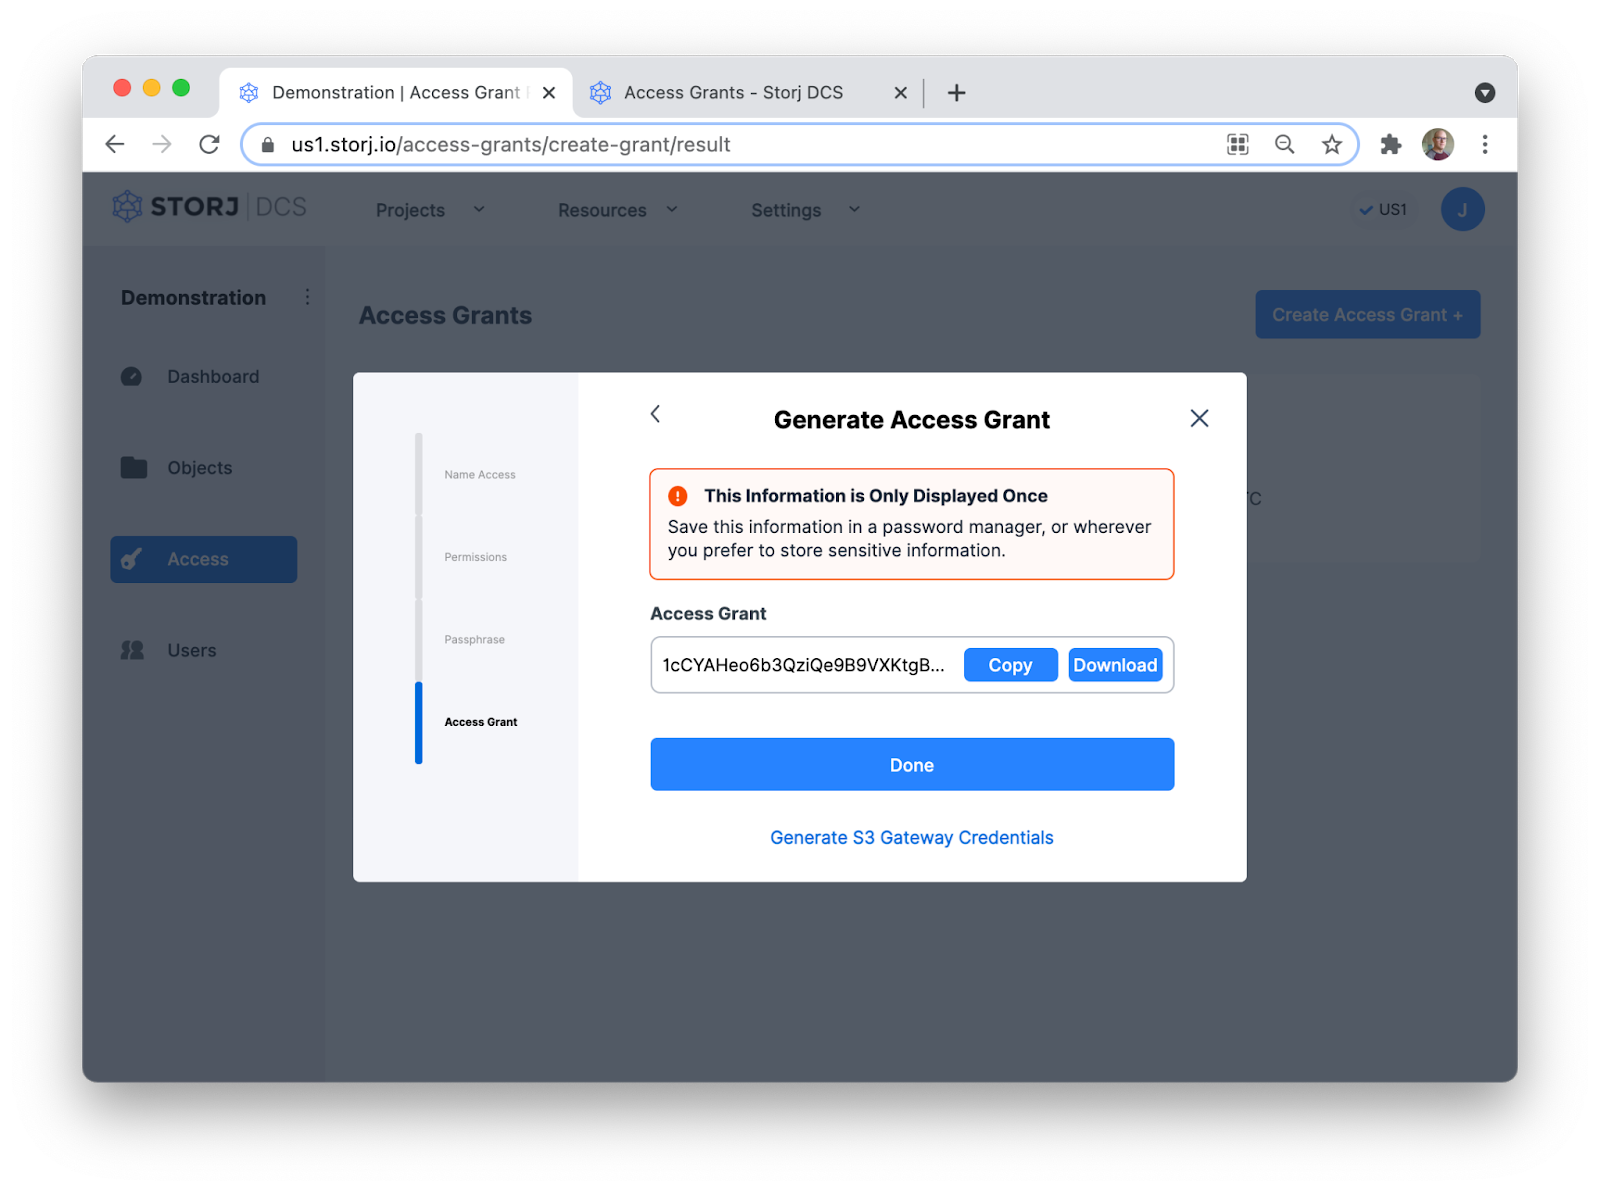
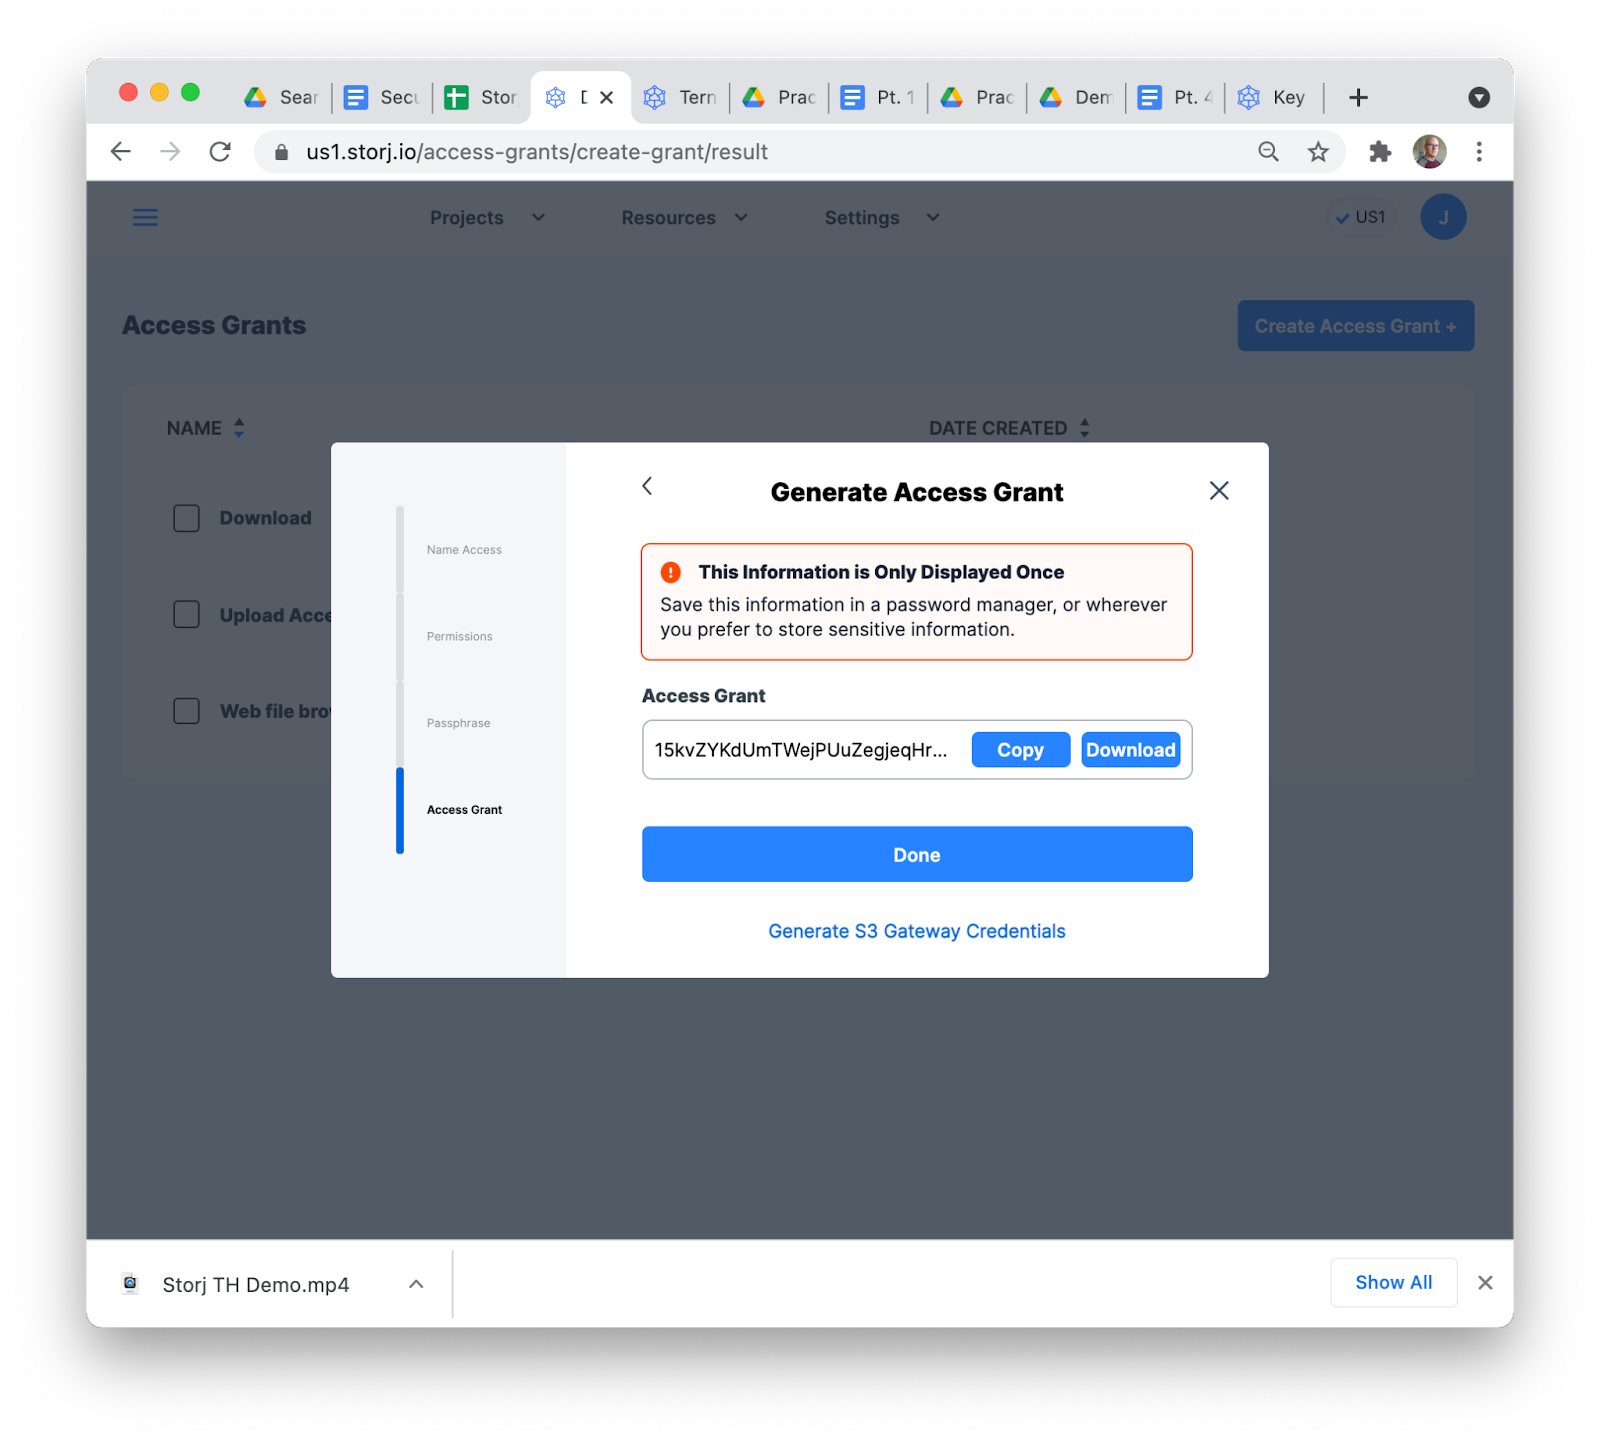
Copy or download your Access Grant. Do not close it before you do, you only have one opportunity to do so.
This Access Grant can now be used to configure tools like the Storj DCS CLI, libuplink library, or apps like Rclone, Restic, or, as in this case, FileZilla. You can also generate credentials for the Storj DCS S3-compatible Gateway from an Access Grant for use with FileZilla Pro.
Keep that Access Grant somewhere safe so you can configure FileZilla and upload your data.
2. Configure FileZilla to Upload Data
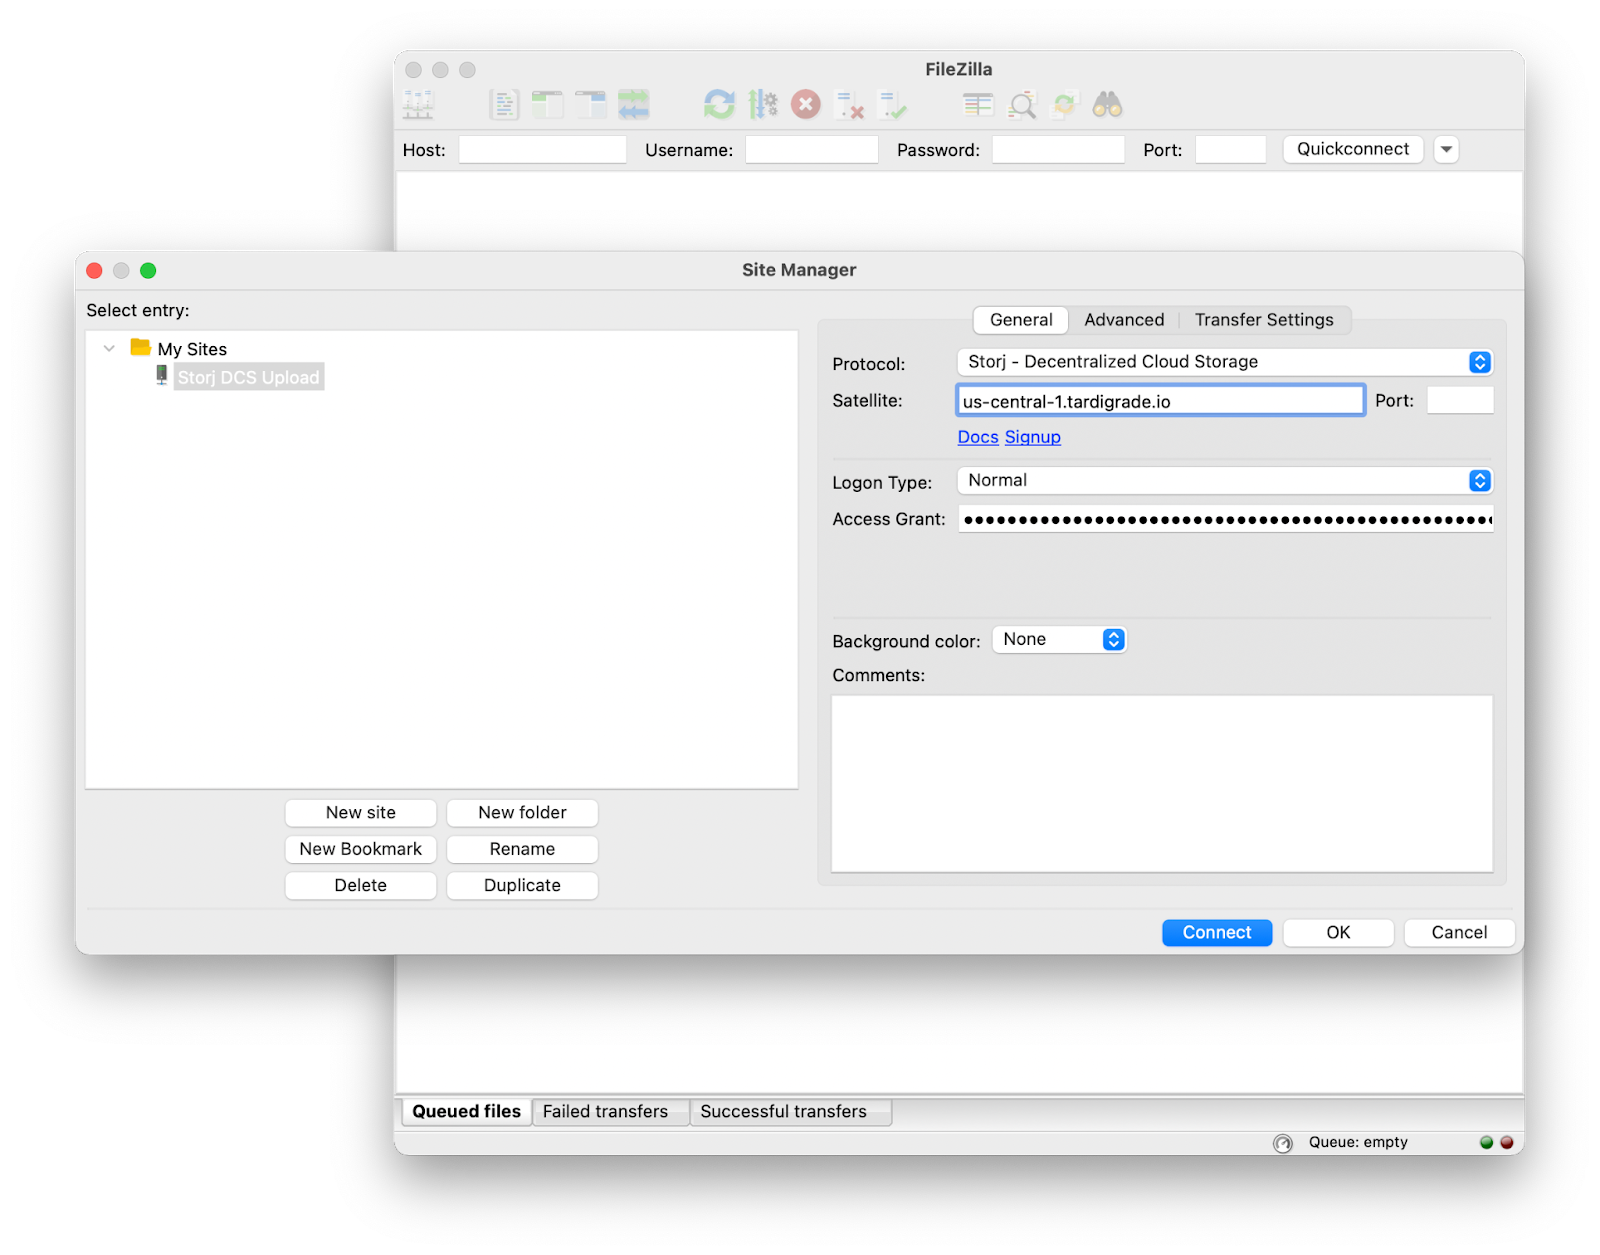
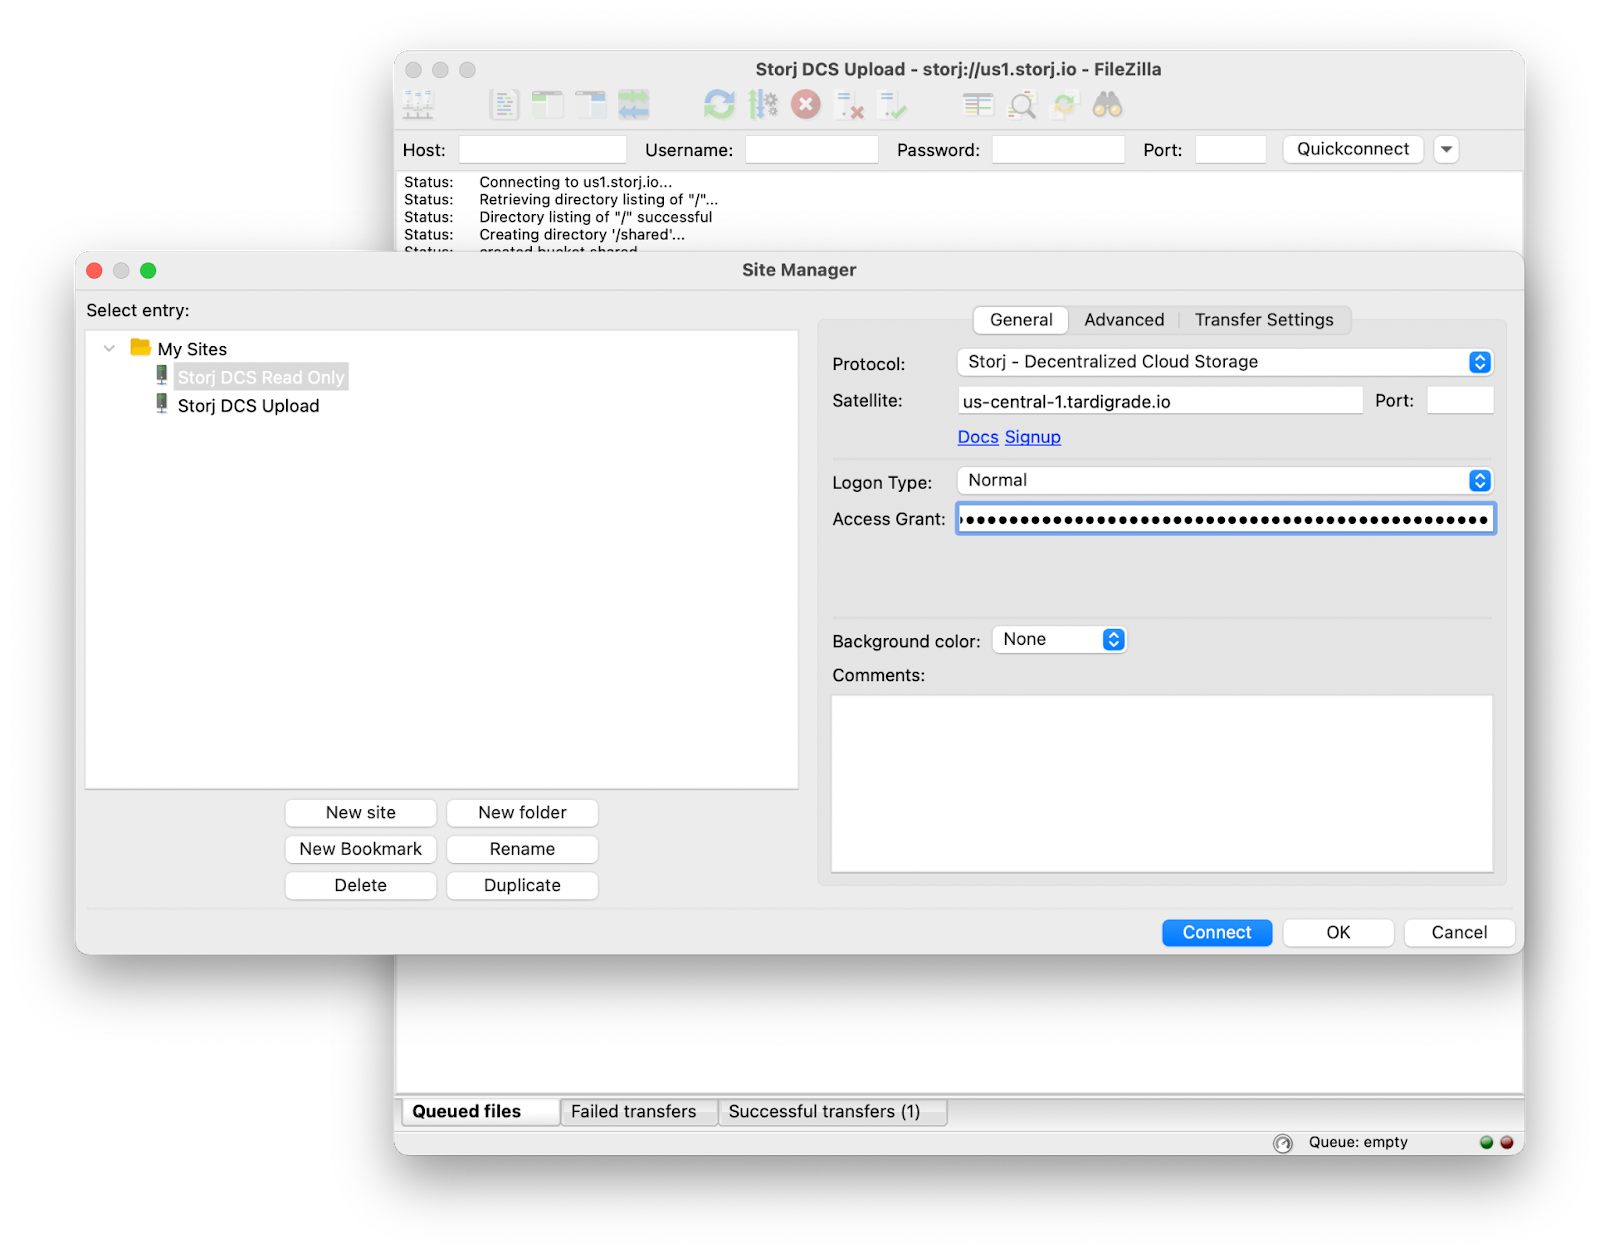
Now, I’ve already downloaded and installed the free version of FileZilla. In FileZilla, open the Site Manager (File -> Site Manager). Choose New Site and give your Storj DCS connection a name. In the Protocol selector, choose Storj Decentralized Cloud Storage. Now copy and paste the Access Grant you just created into the Access Grant field in FileZilla. Click Connect to use your Storj DCS project with FileZilla.
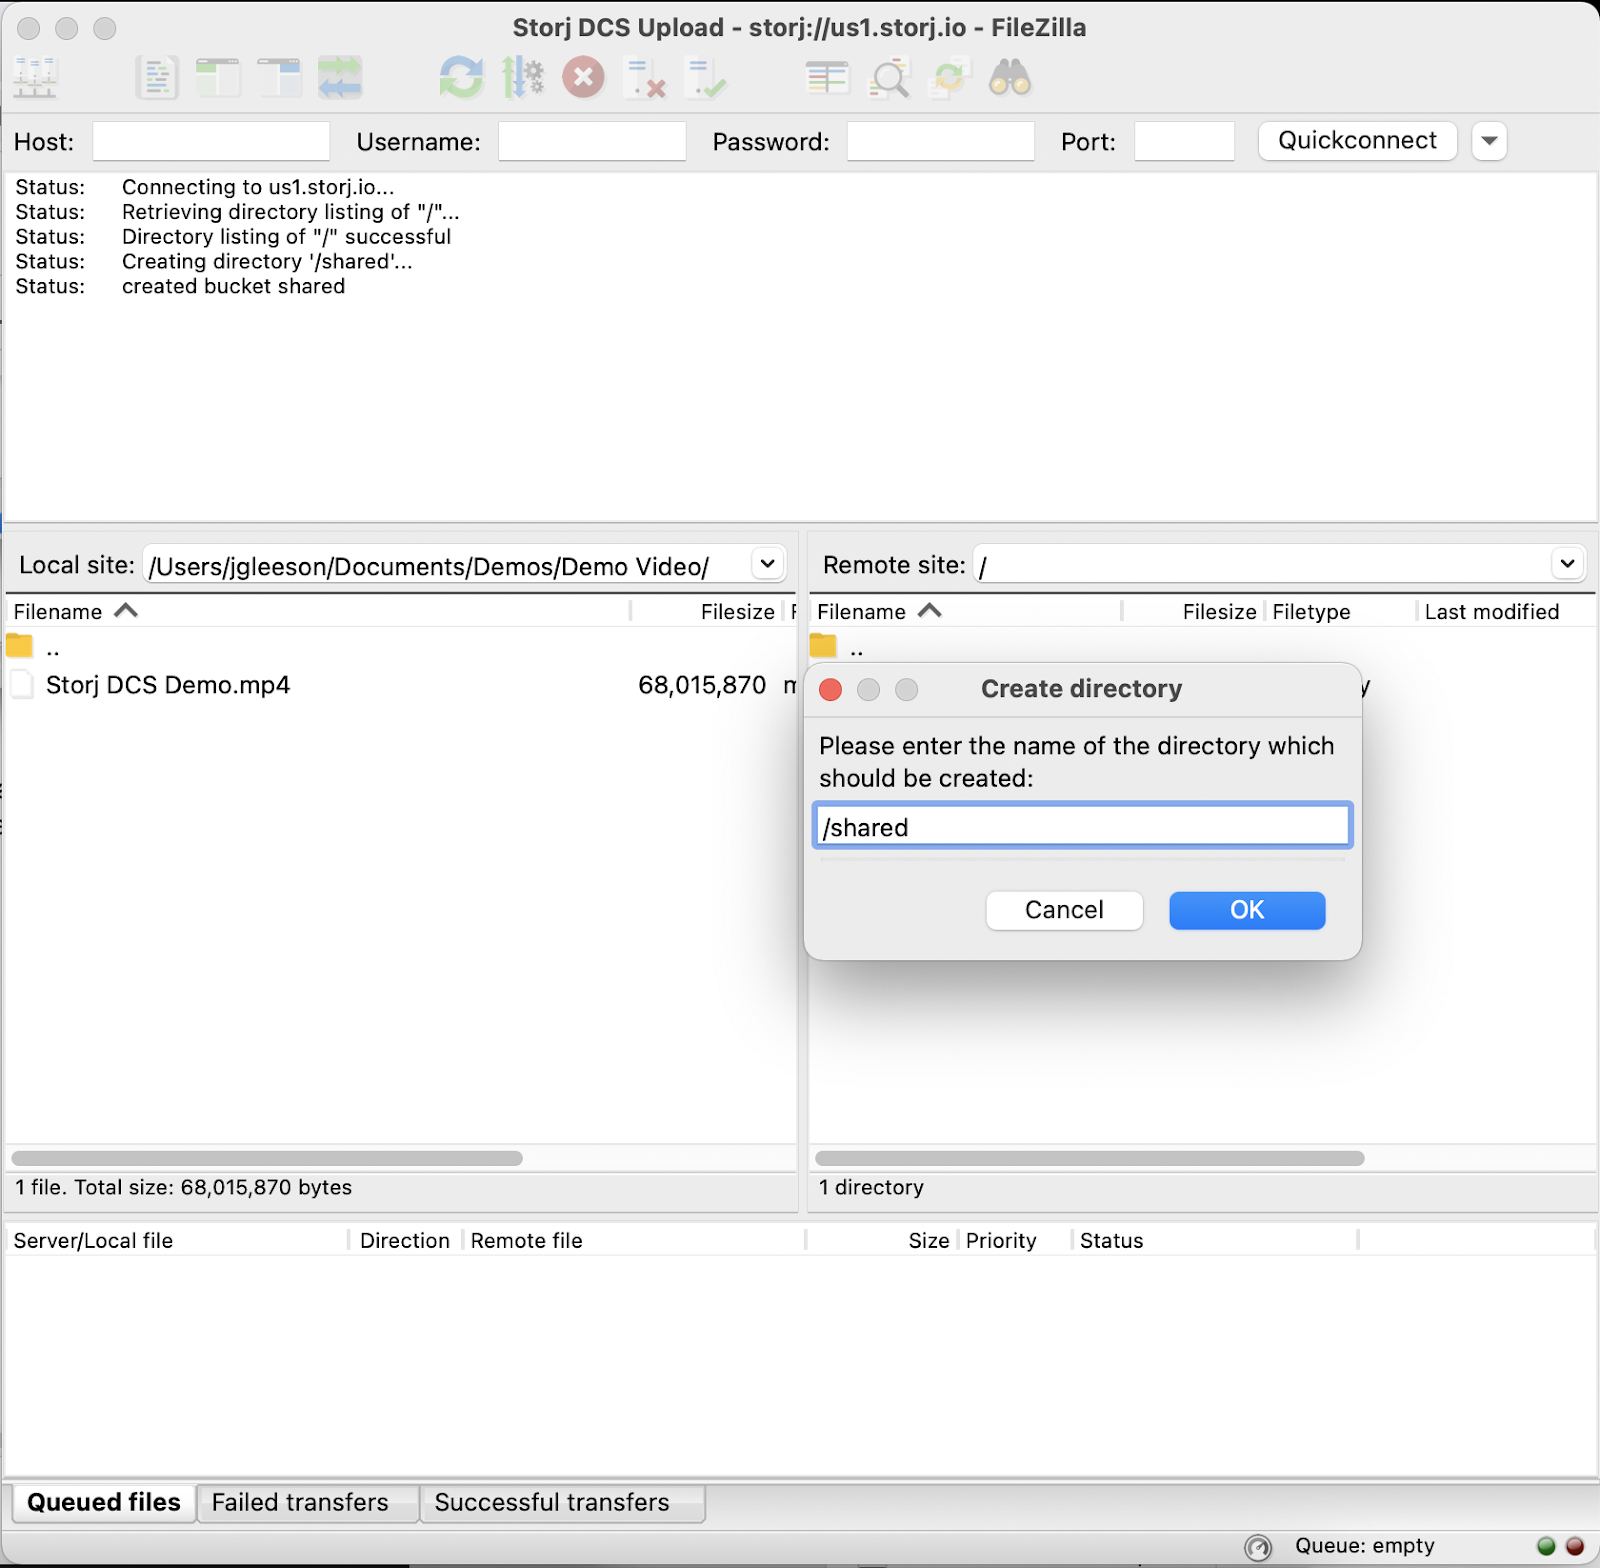
Using FileZilla, you can create a Bucket and upload the data you want to share. Remember, Buckets are a part of the S3 standard and have some specific naming conventions, an easy rule is to just use alphanumeric lowercase characters. I’m going to create a bucket called “shared.” In the Storj DCS pane in FileZilla, right click and select Create Directory.
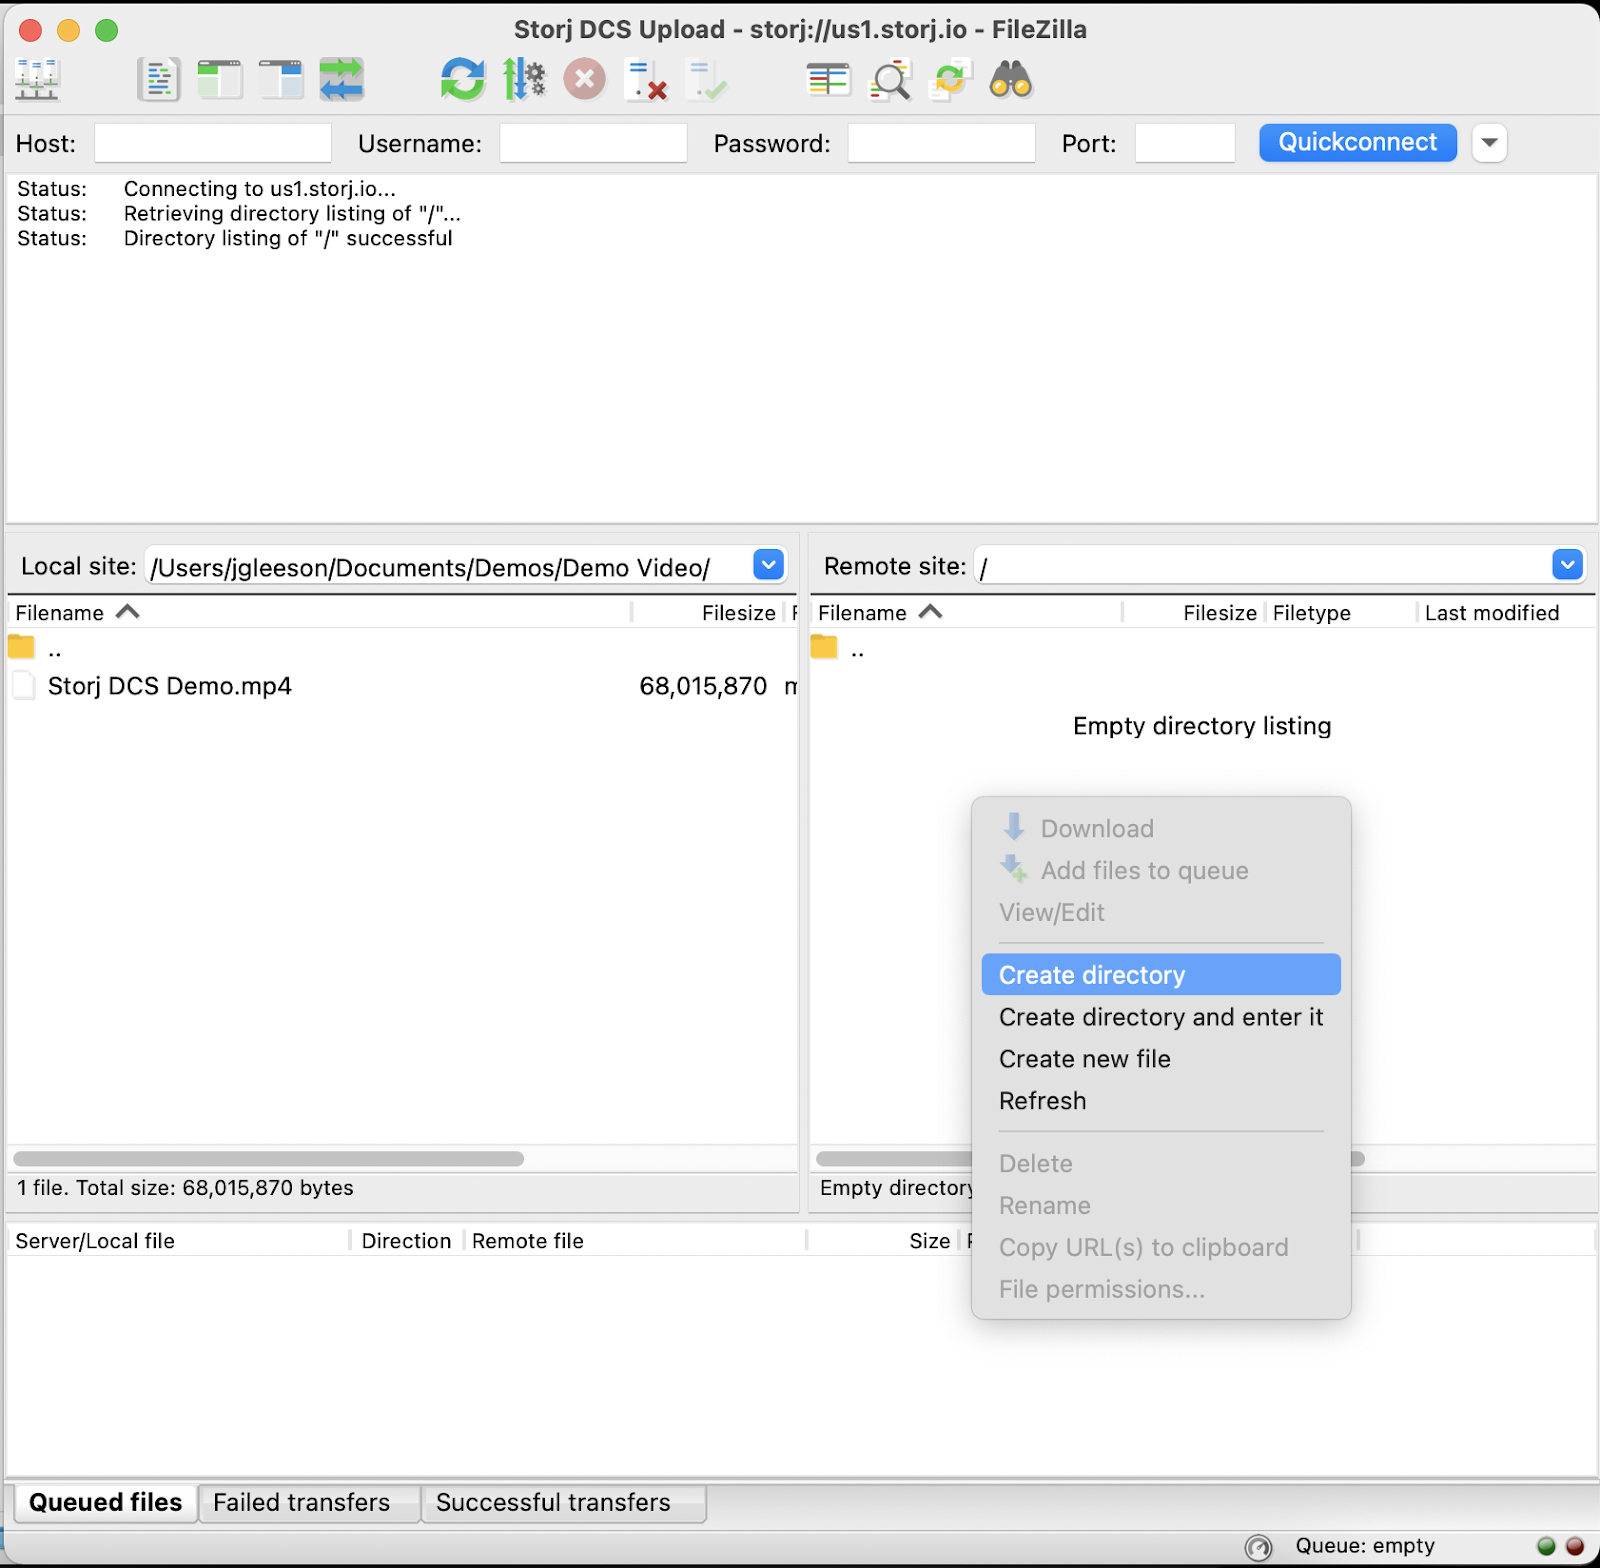
Enter the name of your bucket and click OK. Note that you can create paths inside of Buckets that are not constrained by Bucket naming conventions.
Now, just drag the object you want to share from your local computer directory into your bucket. Double click on your bucket to confirm that your object is uploaded.
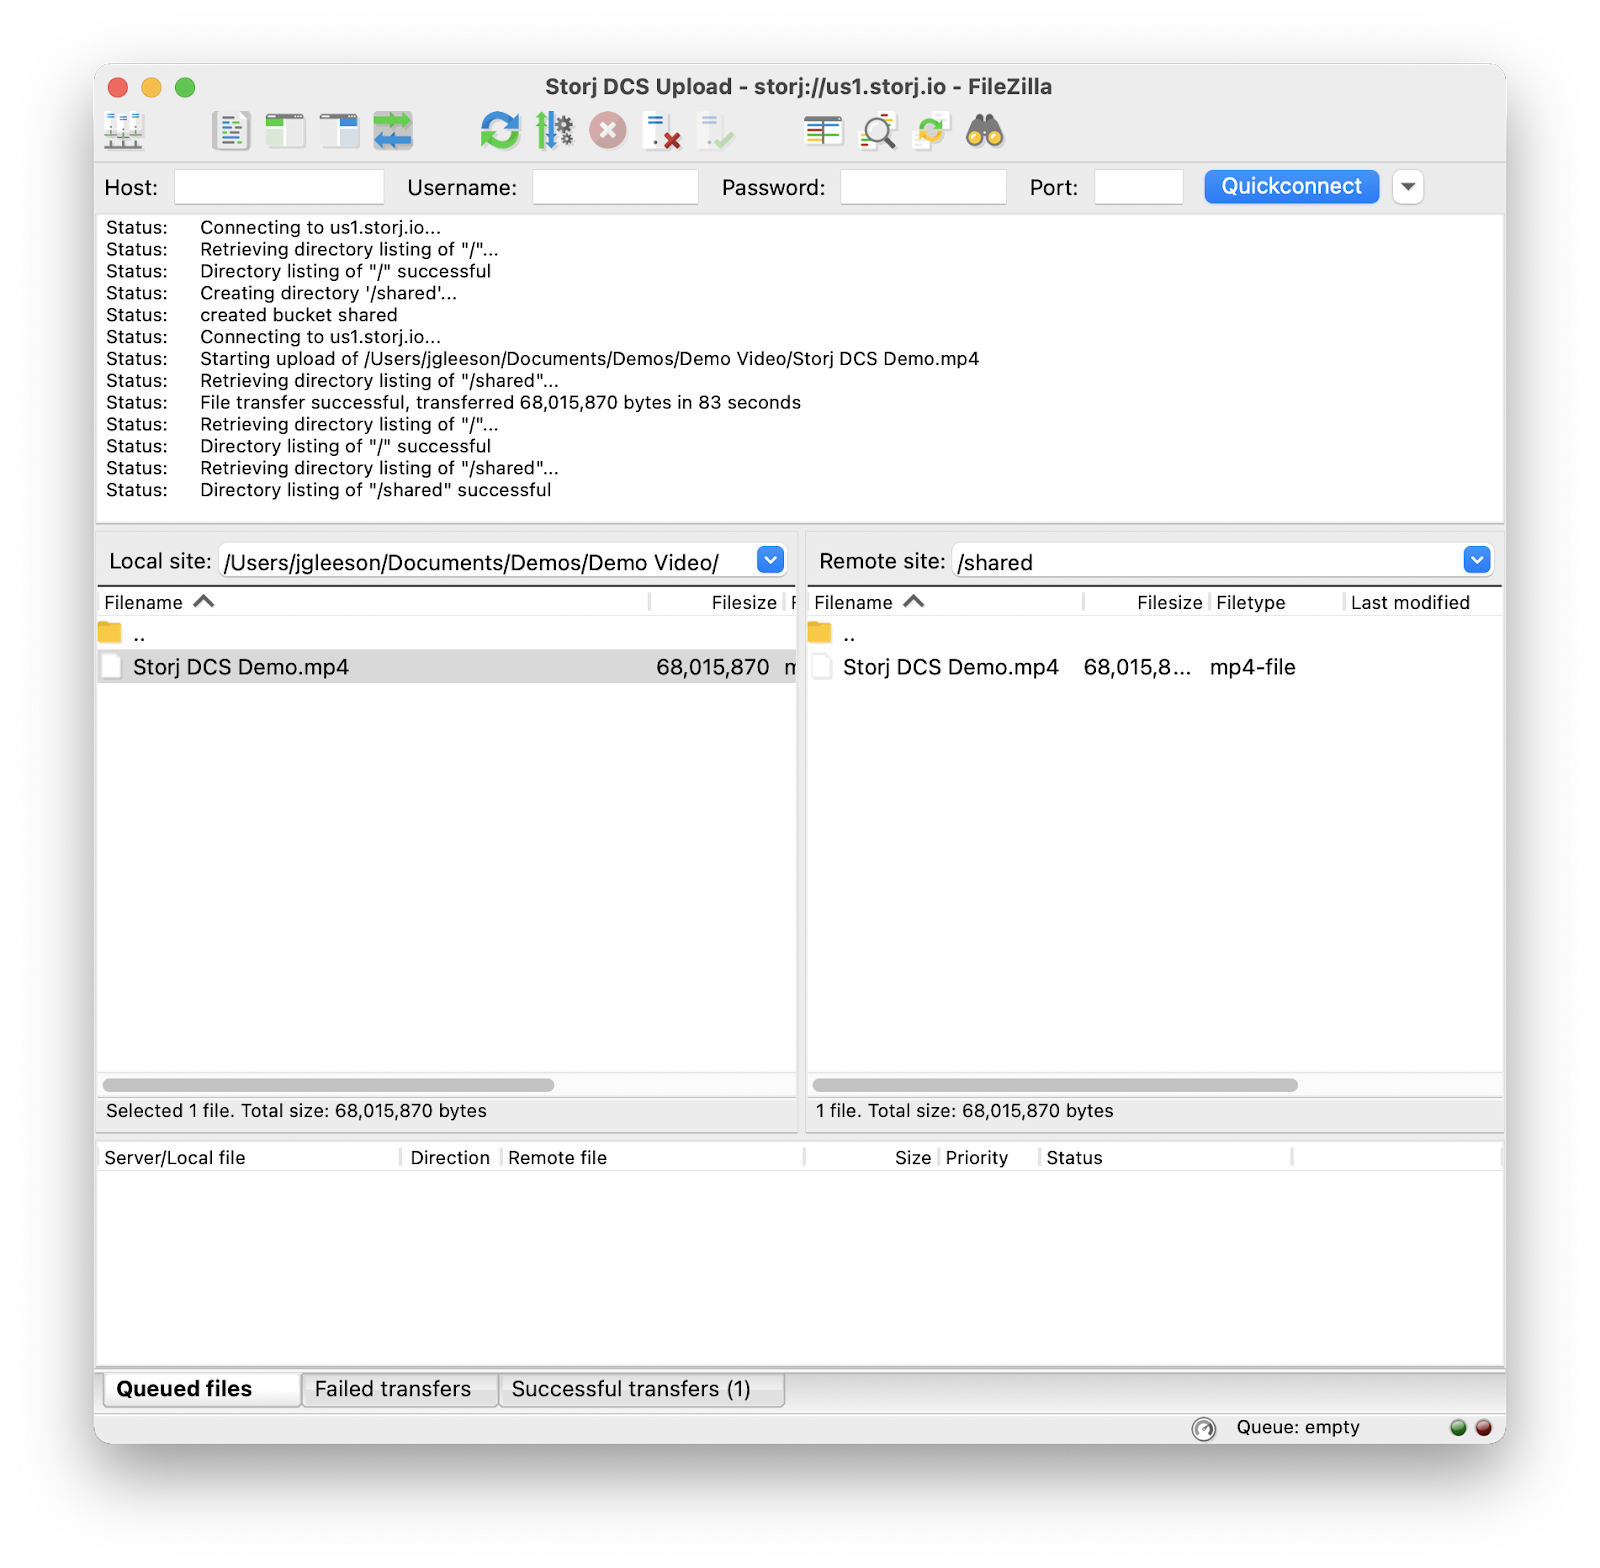
By just dragging and dropping your object into your Storj DCS bucket, that object was end-to-end encrypted, erasure coded into at least 80 pieces and then each of those pieces was uploaded to a different storage node on the network.
Now, we’ll see your object on Storj DCS and create a second Access Grant that you will send to the person with whom you want to share your data. Let’s go back to the Satellite admin console.
3. Create a read-only Access Grant to Download Data (Read Only)
This time when you log in and navigate to to the Dashboard page, you’ll see the Bucket you just created.
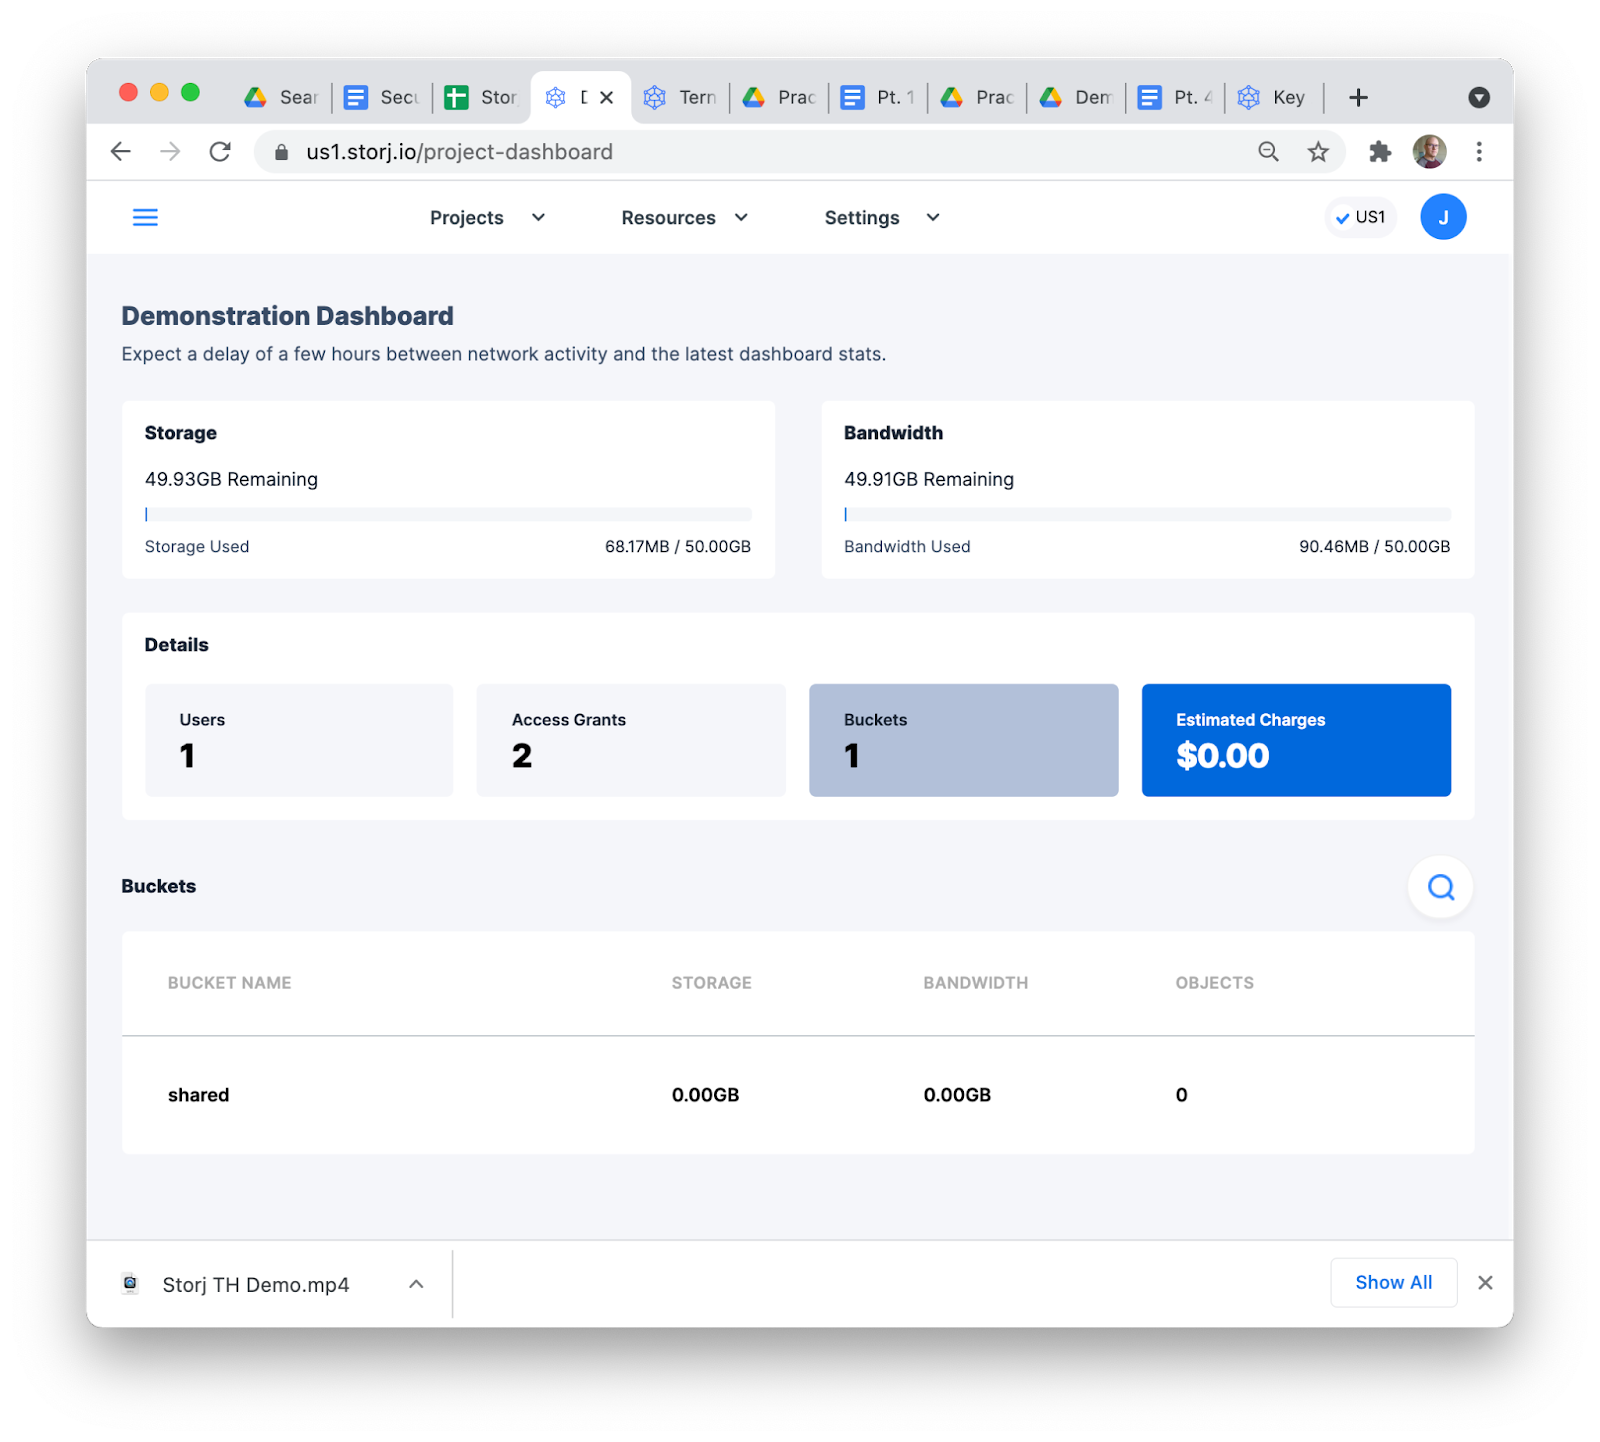
If you want to see the object you just uploaded, you can navigate to Objects on the left-side navigation.
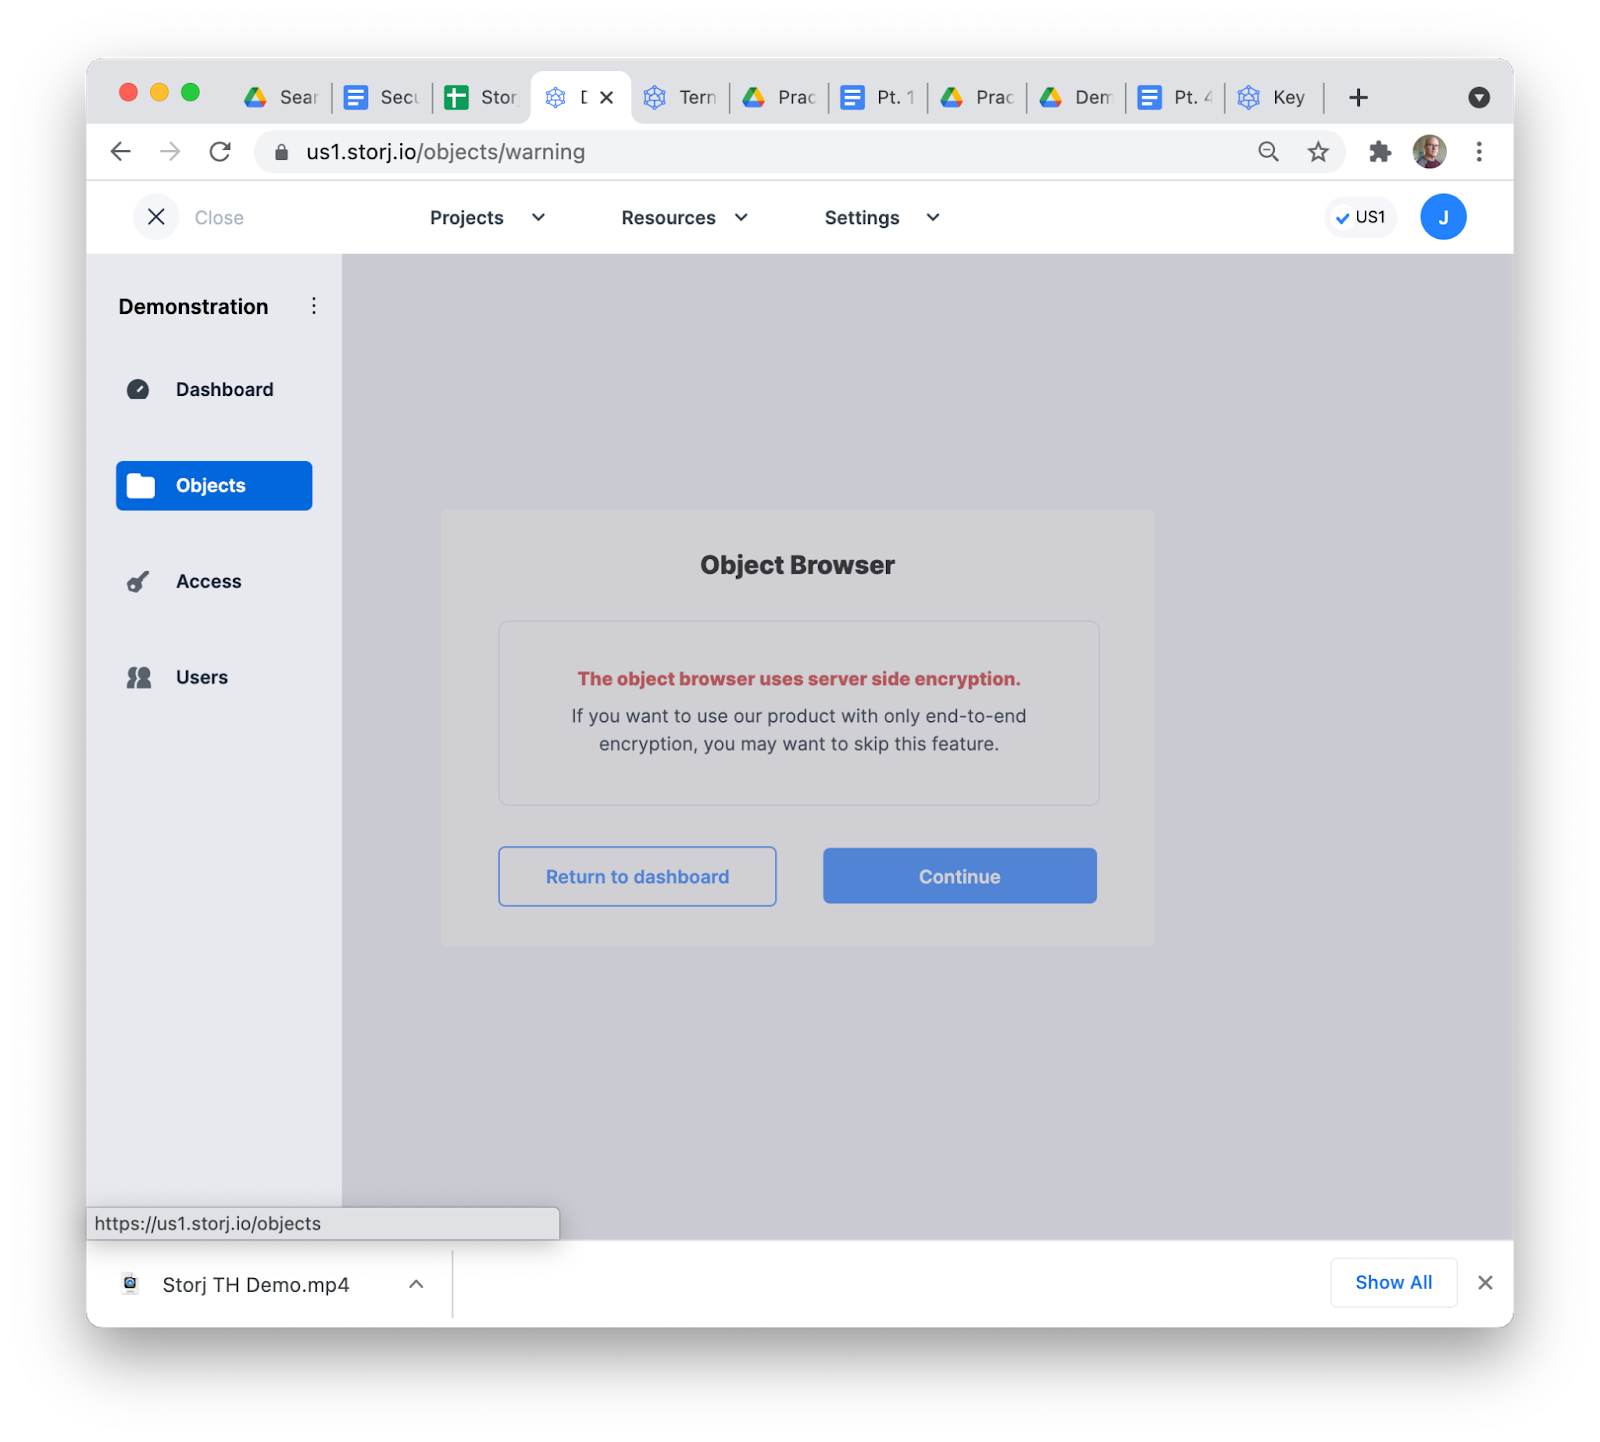
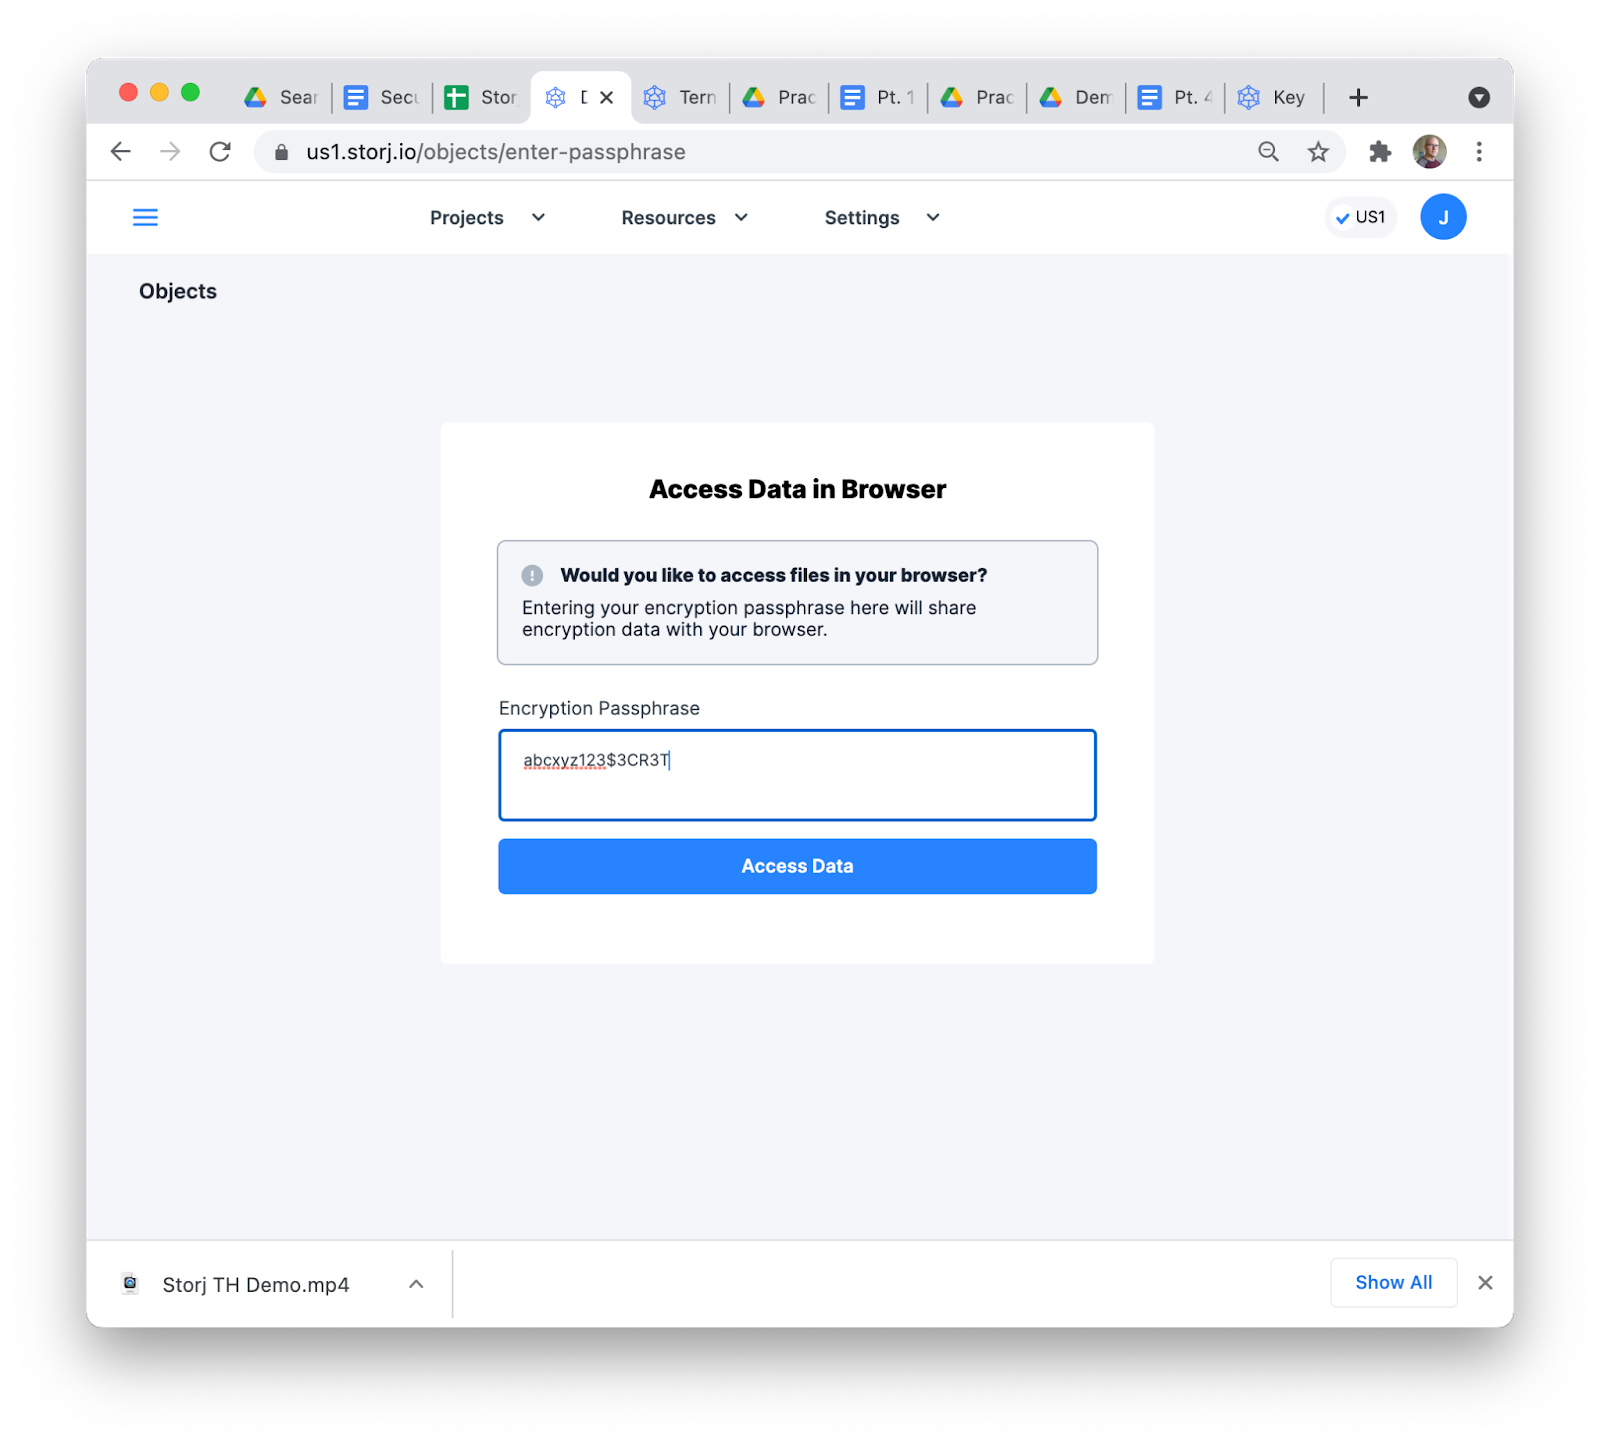
You’ll be prompted to enter your encryption passphrase. Again, this is handled in the browser only, and is not sent to the Satellite. It’s used to decrypt the metadata associated with your object and also to decrypt the object if you download the object. You can read more about the Object Browser in our Docs. Enter your passphrase and choose Access Data.
You can then see the bucket and object. If you click View Details for the object you’ll be presented with a preview of the object, an option to create a sharable link or download the object, and you’ll see the object map that shows you how many pieces your file is broken into and the locations of the storage nodes that are storing those pieces.
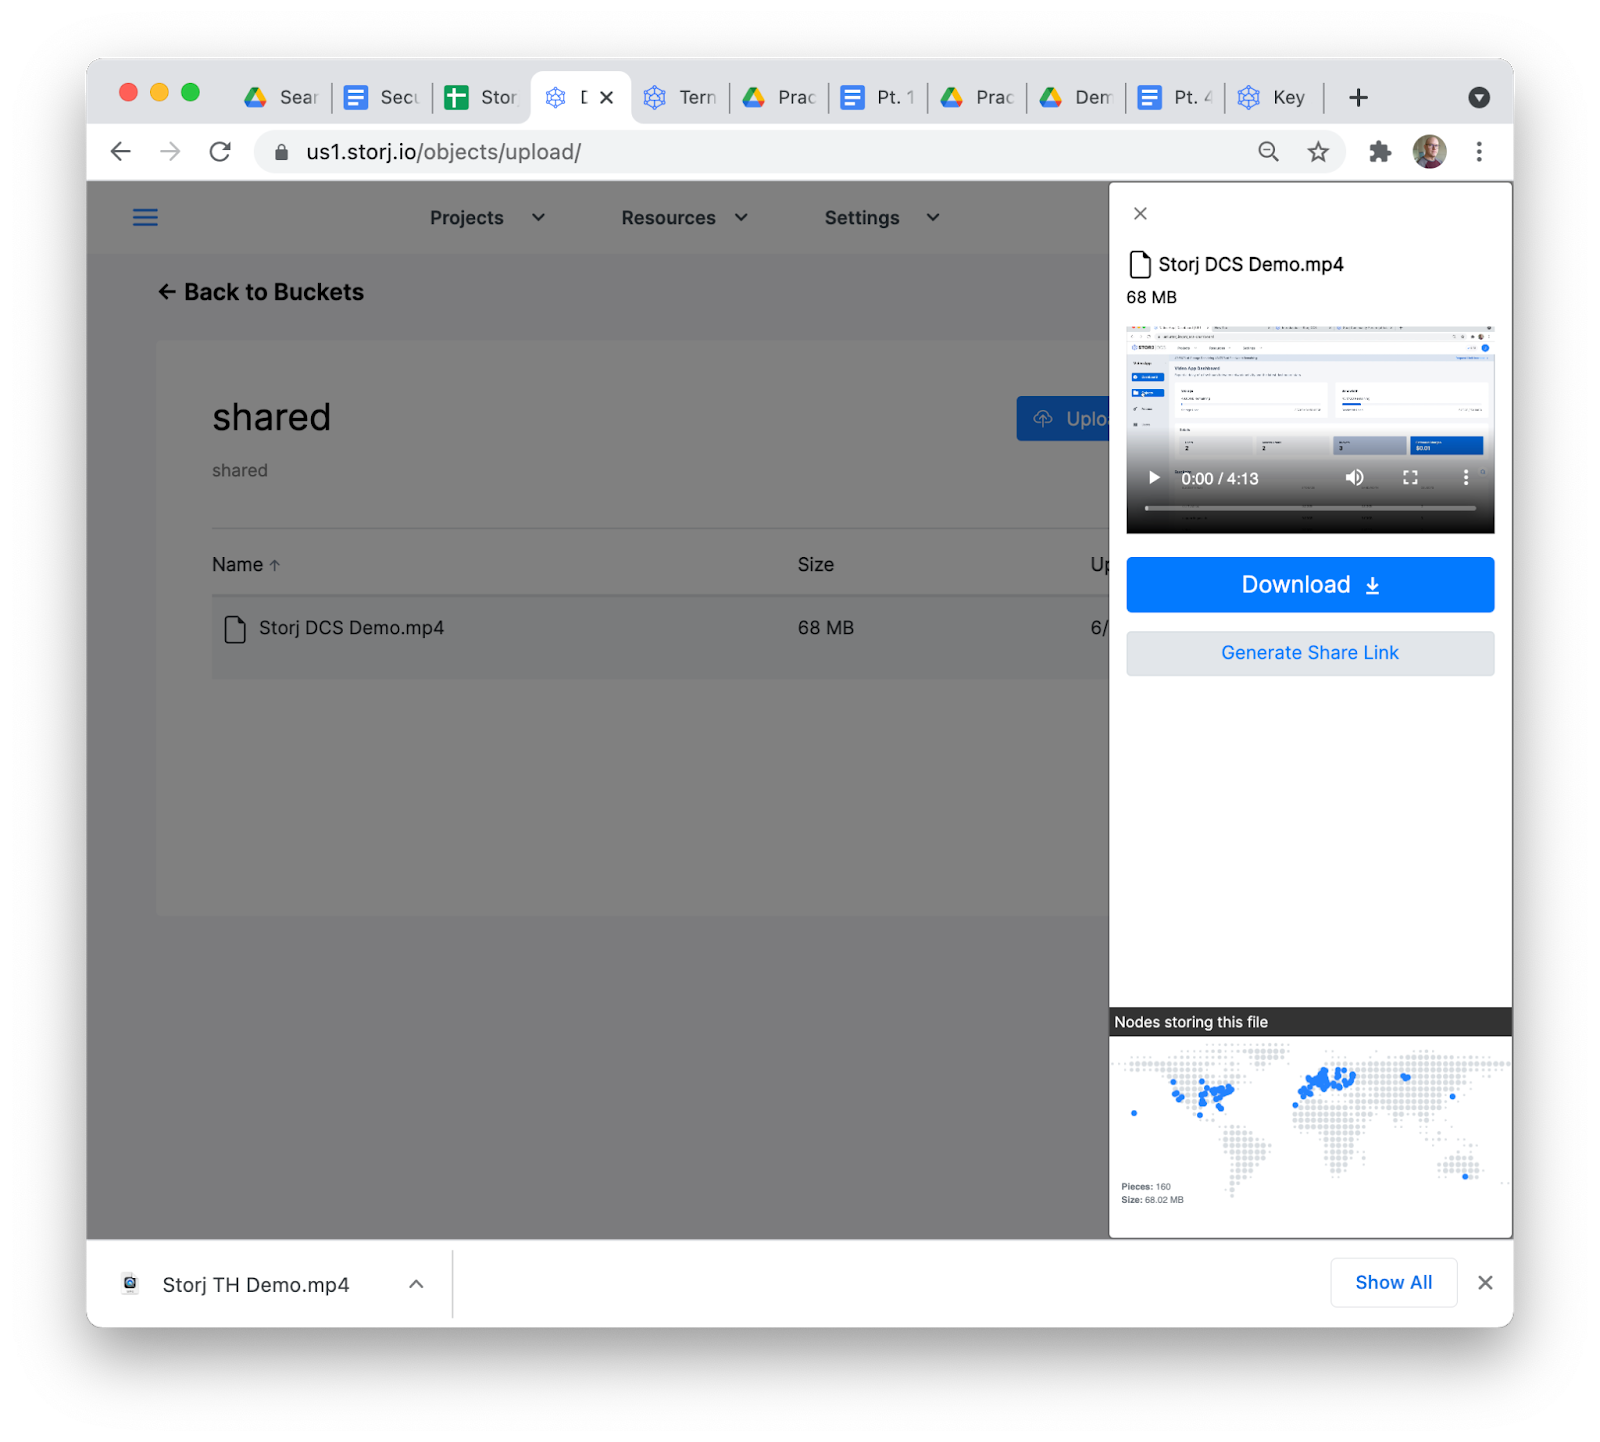
You can see in the example above that the object is stored as 160 pieces on nodes all over the world.
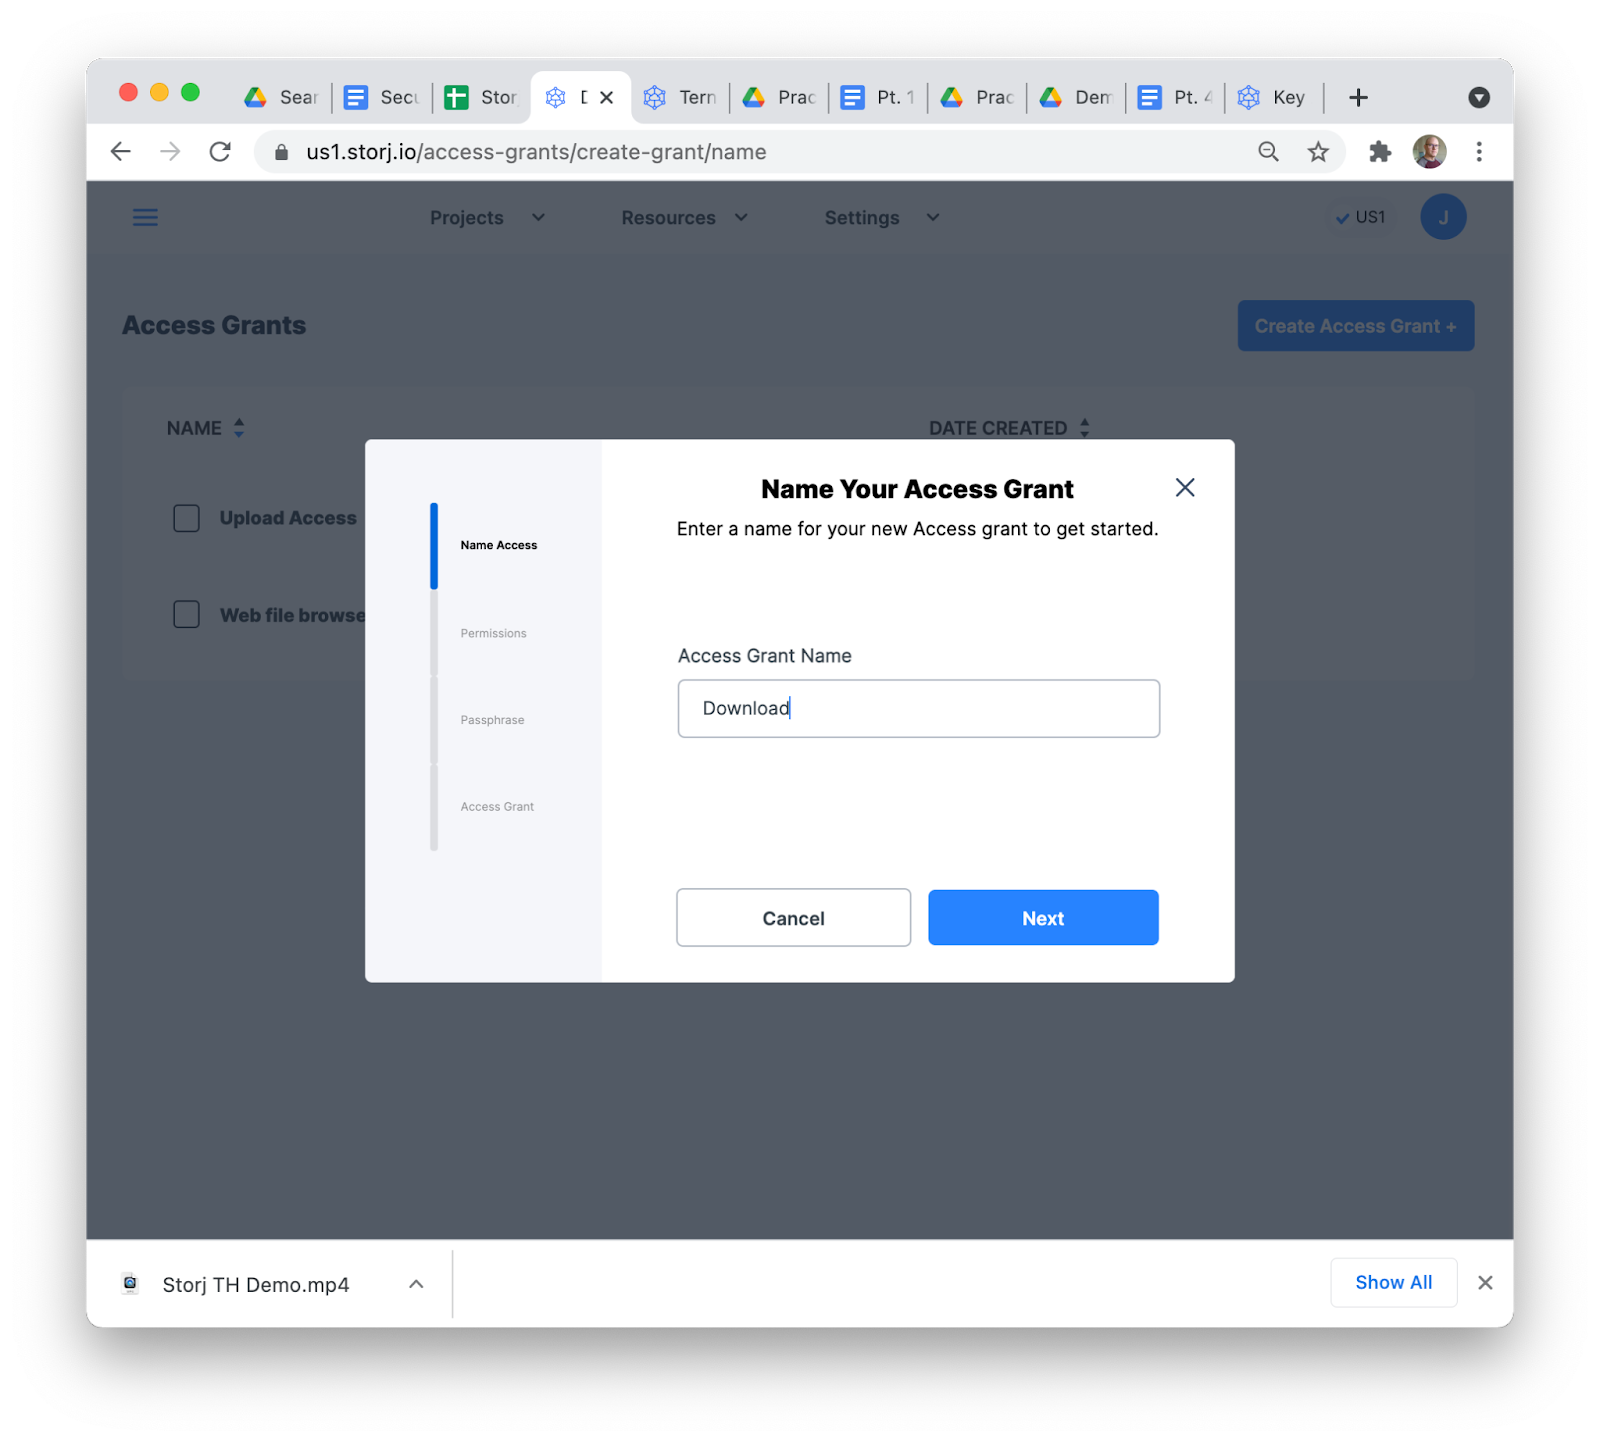
Now, let’s create a second Access Grant to allow read-only access to our bucket. In the Satellite admin console, navigate to the Access Screen, click Create Access Grant, name your Access Grant “Download” and click Next.
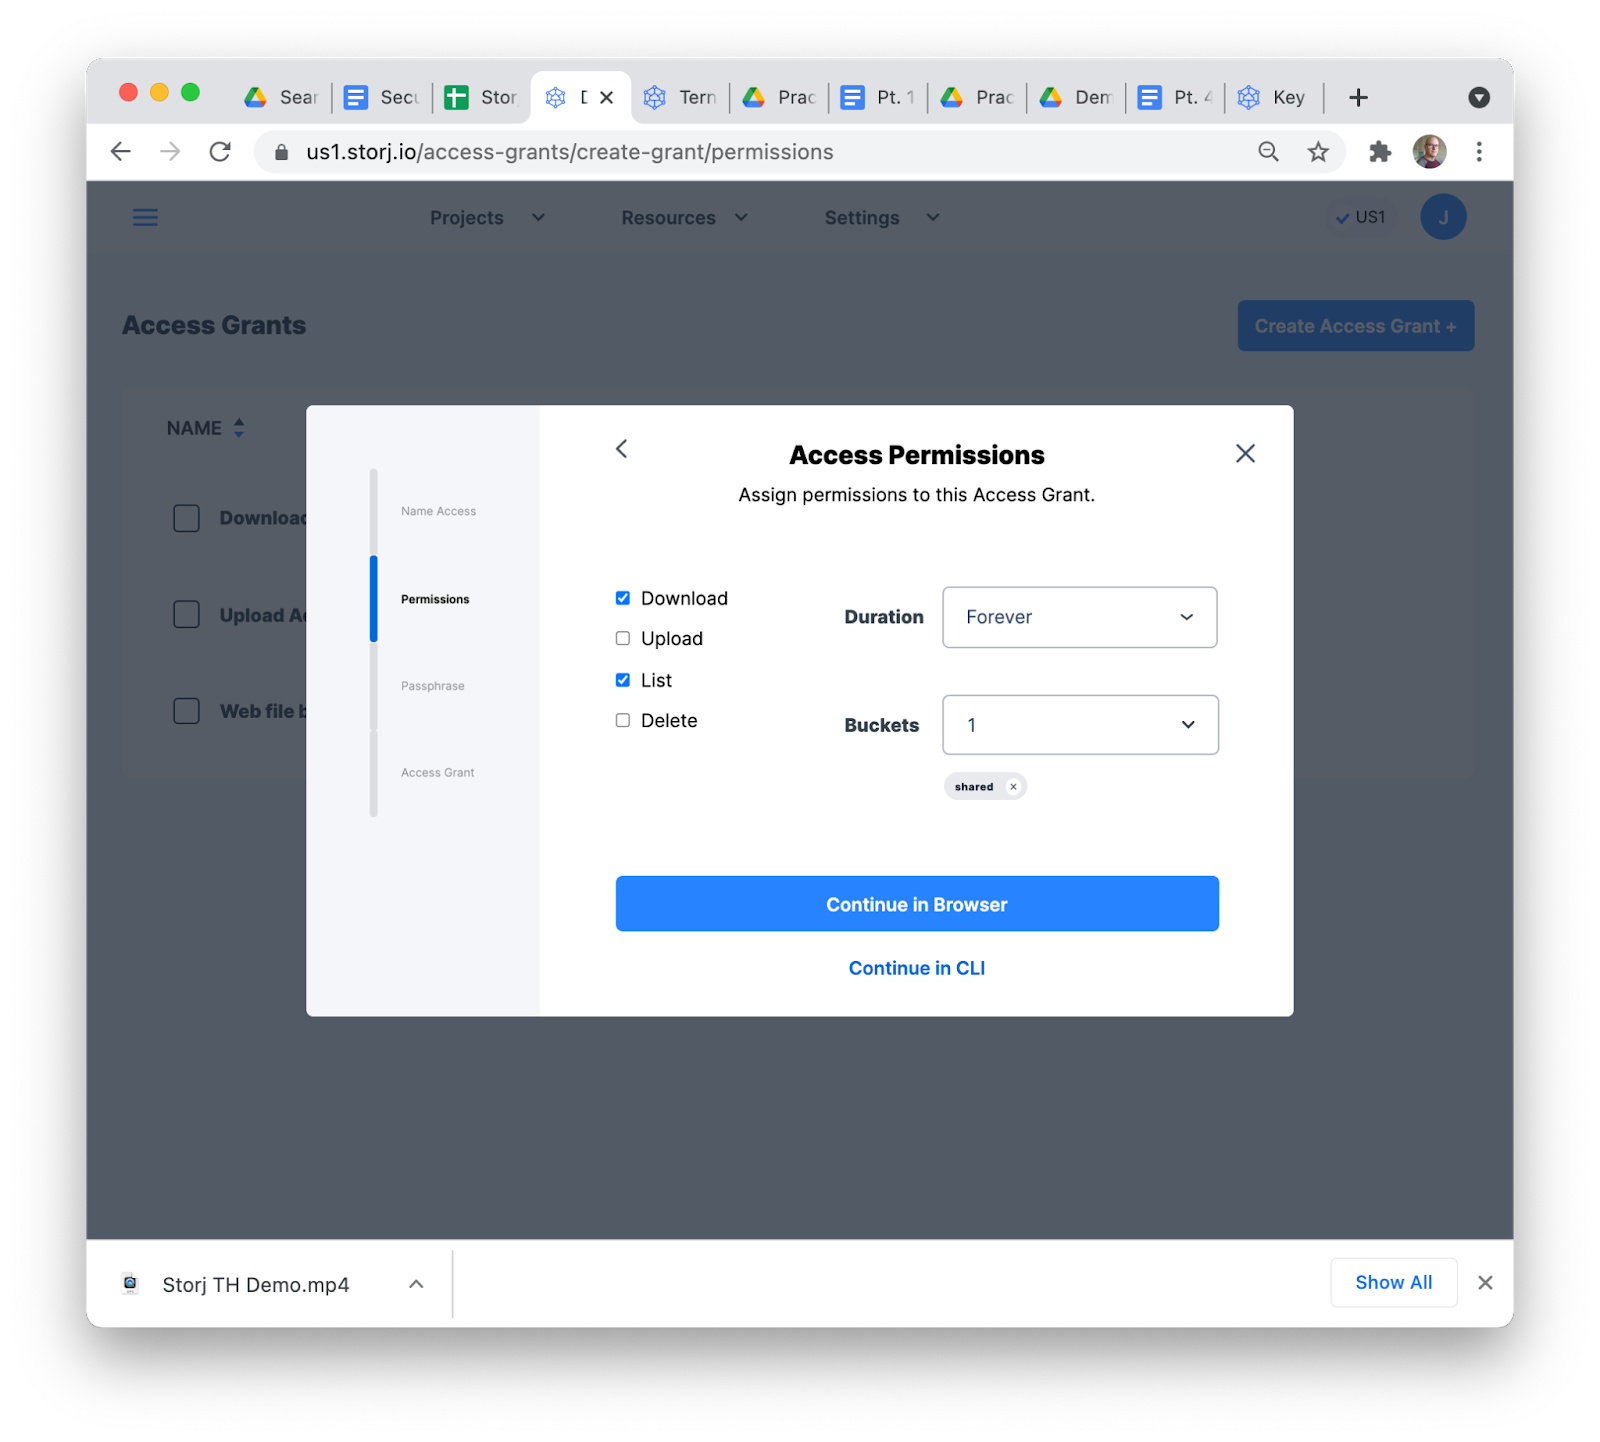
Now, you can make your Access Grant read- only by de-selecting Upload and Delete. You can scope this Access Grant to just the Shared Bucket. Then click Continue in the Browser.
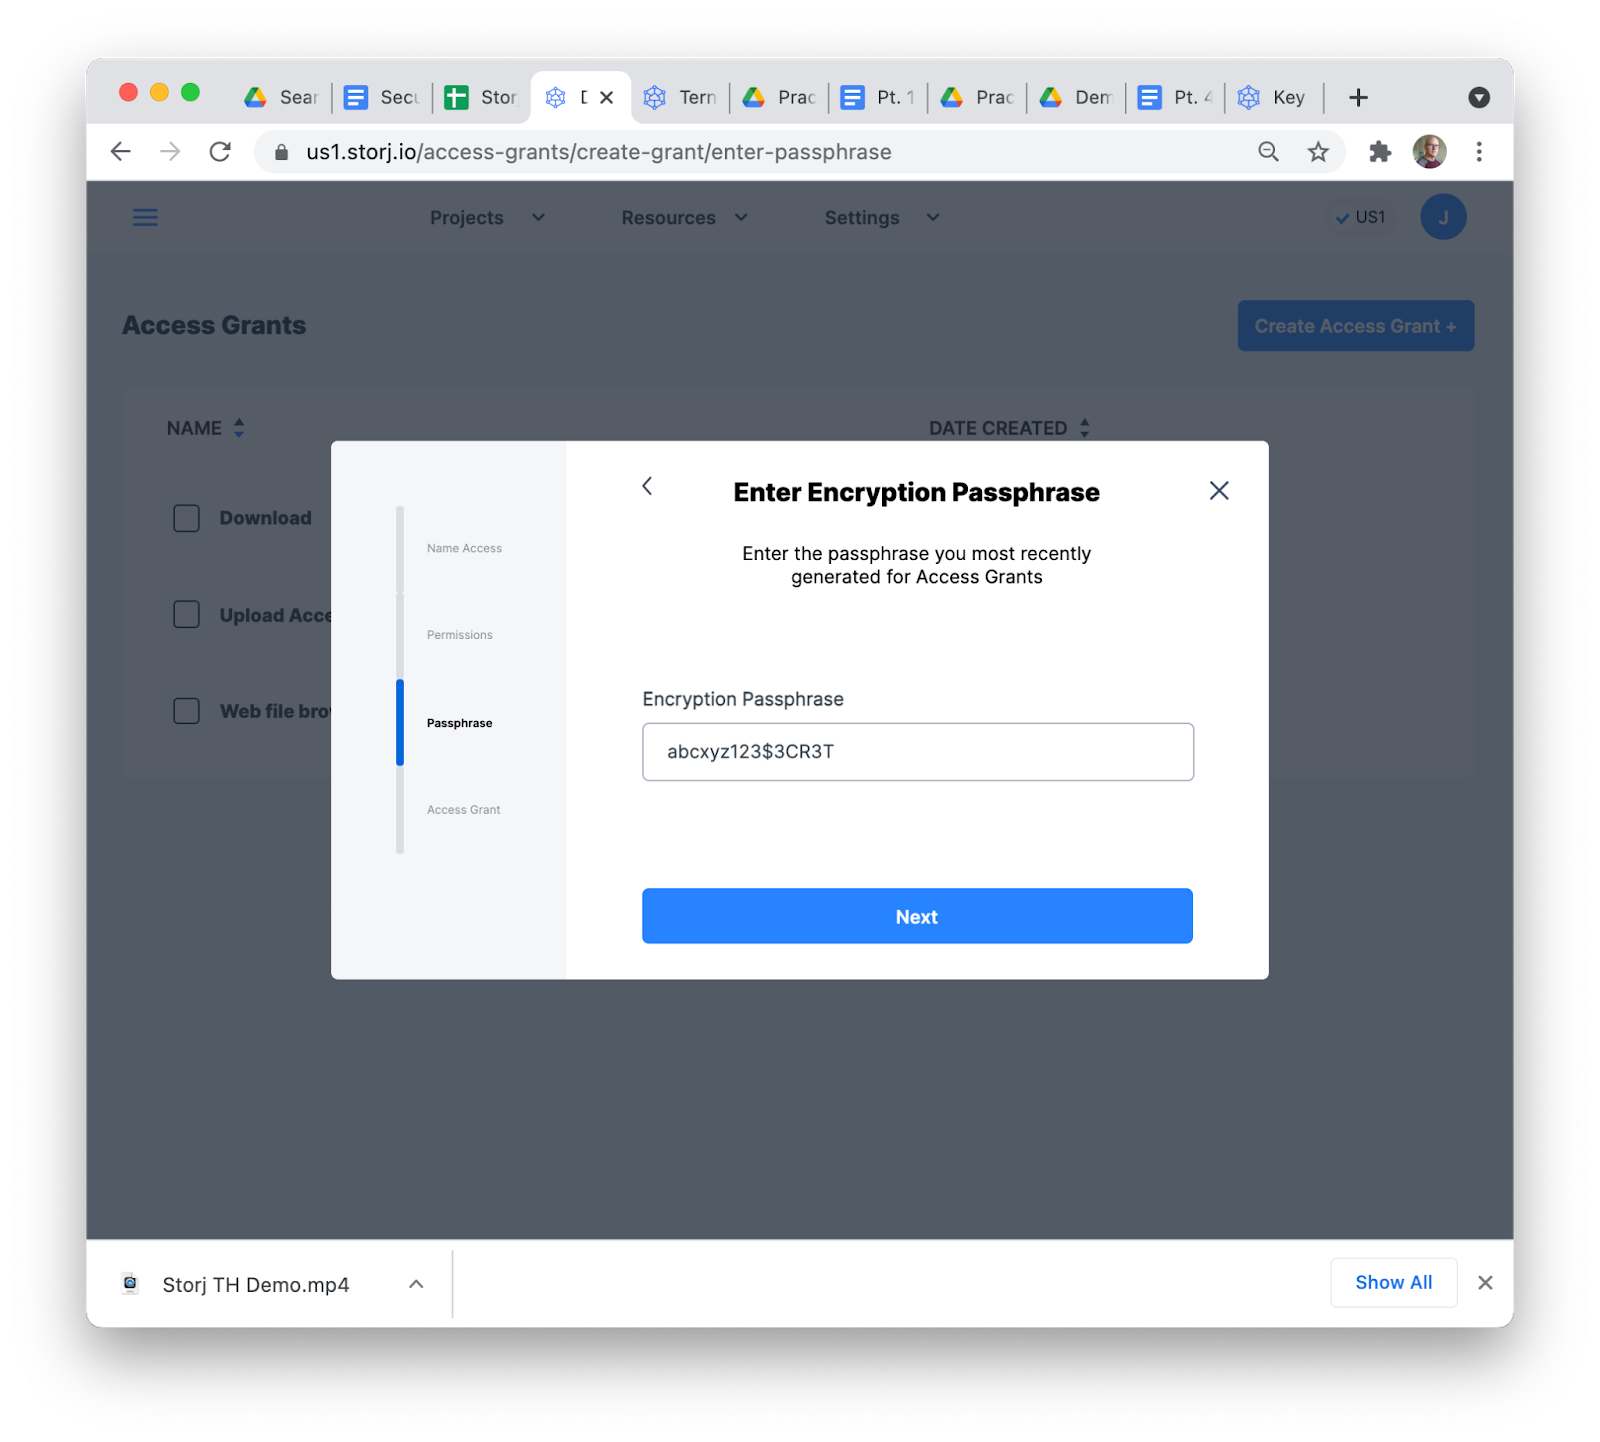
Paste in the same encryption passphrase you used to upload the object and click Next.
Download or copy the Access Grant. This is all you need to send to another person to be able to download the contents of the Shared Bucket. While it is fast and convenient to use the browser based tools, you can also create the second credential using the CLI and further restrict the credential with more granular permissions.
Now, let’s configure FileZilla to use that new restricted credential to download your object.
4. Configure FileZilla to Download Data
When someone wants to use FileZilla to download the data you are sharing, they follow the same steps to configure a new FileZilla Site in Site Manager.
In FileZilla, open the Site Manager (File -> Site Manager). Choose New Site and give your read-only Storj DCS connection a name. In the Protocol selector, choose Storj Decentralized Cloud Storage. Now copy and paste the read-only Access Grant you just created into the Access Grant field in FileZilla. Click Connect to use this new Storj DCS Access Grant with FileZilla.
When you click Connect, you’ll see the Shared Bucket, but unlike when you used the unrestricted credential, you’ll only be able to download data in the Shared Bucket. If you try to add buckets, add paths, add more objects or delete existing objects, you will not be able to do so with the credential provided.

That’s all there is to it. You’ve successfully configured FileZilla to create a Bucket, upload end-to-end encrypted data, created a restricted credential to share that data, and configured FileZilla to download that data.
Once you understand the basic building blocks of the service, it’s pretty easy to build some fairly sophisticated privacy and security controls into your application. In the next blog in this series, we’ll cover how you can use the granular levels of Access Grants to add an additional layer of protection for immutable data that’s secure, private and ransomware resistant.